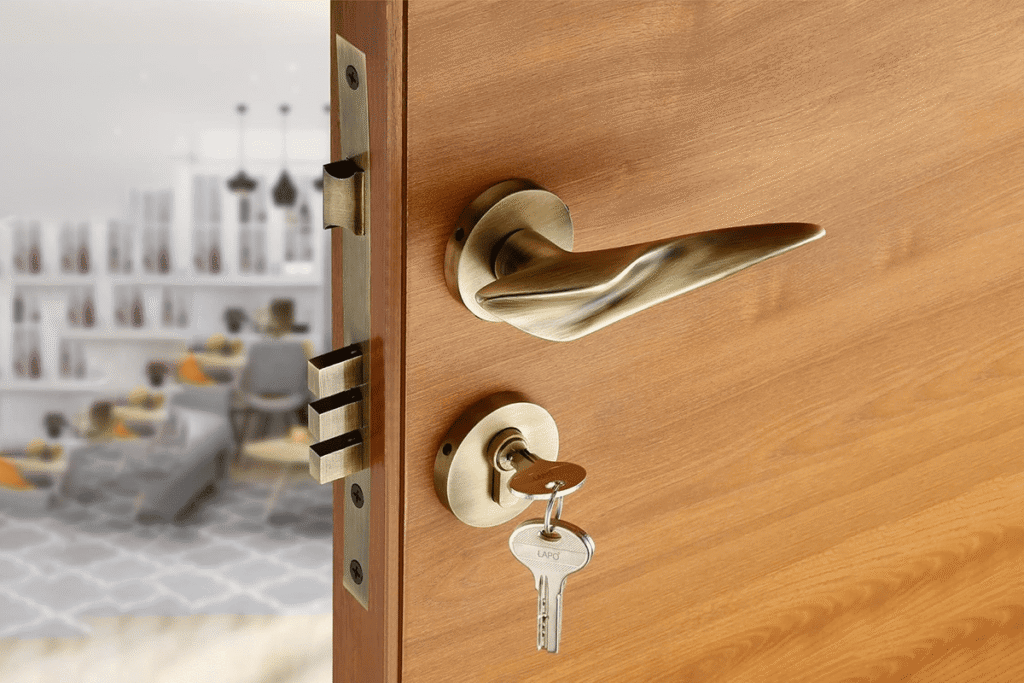
How to Change a Front Door Lock?
Learning how to change a front door lock can feel simple until the new lock does not fit, the latch will not close, or the cylinder sticks out too far. The real problem is not the screwdriver. It is compatibility. I approach replacement by identifying the lock standard, function, dimensions, and cylinder type before removing anything.
To change a front door lock correctly, first identify the lock standard, lock function, backset, center-to-center distance, forend size, and cylinder type. Then remove the old cylinder, handles, and lock body. Install the new lock body first, followed by the handles and cylinder. Test latching, locking, key operation, and handle movement before final tightening.
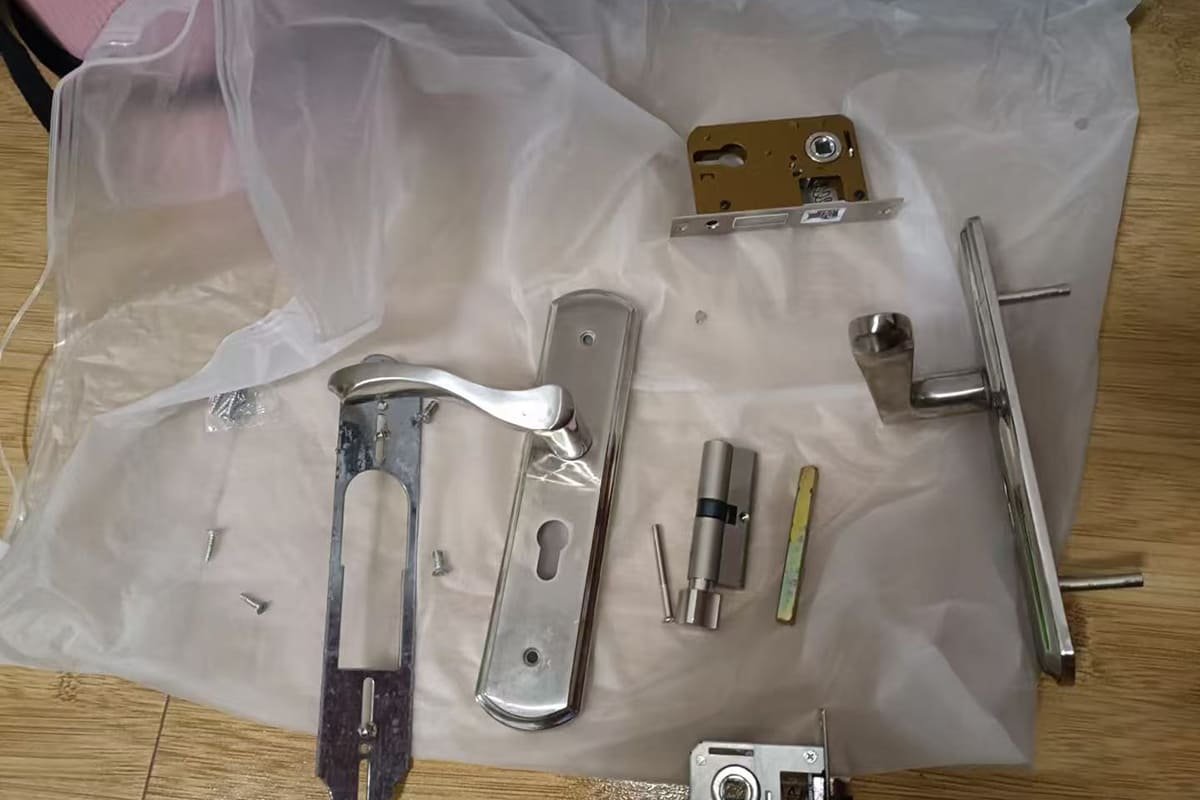
Many replacement problems start before the old lock comes out. A lock that looks similar online may follow a different standard or preparation. I will walk through the decision process I use as a door hardware manufacturer, so you can avoid buying the wrong front door lock.
What Should I Check Before I Change a Front Door Lock?
It is tempting to start by removing screws. That can create stress if the door is open, the parts are loose, and the new lock does not match. Before I change a front door lock, I check the standard, function, main dimensions, cylinder type, and door preparation.
The most important checks before replacing a front door lock are lock standard, lock function, backset, center distance, forend size, cylinder type, cylinder length, door thickness, and strike plate position1. These details decide whether the new lock can fit the existing door cutout and operate safely.
Start With Compatibility, Not Tools
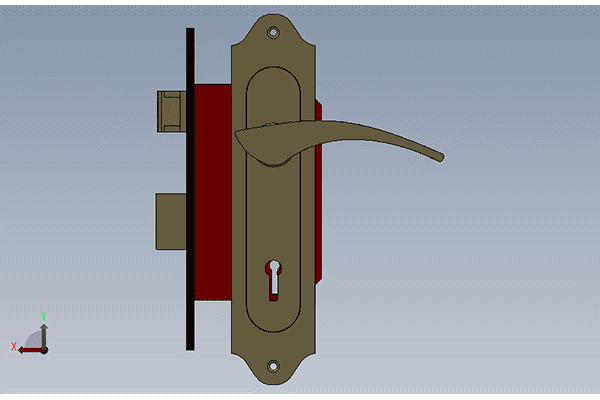
In manufacturing, I see many lock replacement issues that come from one assumption: “If it looks close, it will fit.” That is often false. Door locks are mechanical systems. The lock body, cylinder, handle set, strike plate, screw holes, latch position, and door preparation must work together.
Before you buy a replacement, I recommend making a simple checklist:
Lock standard
- American standard
- European standard
- Regional or special project standard
Lock function
- Sashlock
- Passage lock
- Night latch
- Classroom lock
- Bathroom/privacy function
- Entrance lock
Critical dimensions
- Backset
- Center-to-center distance
- Forend width and height
- Lock case depth
- Door thickness
Cylinder type
- Double-side key cylinder
- One-side key / one-side knob cylinder
- Bathroom cylinder
- Euro profile cylinder
- Rim cylinder or other special cylinder
Visible finish and trim
- Lever handle finish
- Escutcheon or rose size
- Screw spacing
- Strike plate shape
Why This Matters
A front door lock does more than close a door. It must latch smoothly, lock securely, align with the frame, and match how people enter and exit. If the replacement lock has the wrong backset, the latch will not meet the strike plate correctly.2 If the center distance is wrong, the handle and cylinder holes will not line up. If the cylinder length is wrong, it may sit too deep or project too far.
Here is a simple compatibility table:
| Item to Check | Why It Matters | Common Problem If Wrong |
|---|---|---|
| Lock standard | Determines lock body shape and preparation | New lock does not fit the cutout |
| Backset | Sets latch position from door edge | Door cannot latch into strike |
| Center distance | Aligns handle and cylinder | Handle or cylinder holes do not match |
| Forend size | Fits the door edge recess | Plate sits proud or leaves gaps |
| Cylinder length | Matches door thickness and trim | Poor appearance or weak operation |
| Lock function | Controls how the door locks and opens | Wrong user operation or security level |
I always treat measurements as non-negotiable. A 5 mm difference can be enough to make a lock unsuitable.
How Do I Identify the Lock Standard Before I Change a Front Door Lock?
A common mistake is to compare only the outside handle style. Two front door locks can look nearly identical from the room side but follow completely different standards inside the door. I identify the lock standard before choosing any replacement parts.
To identify the lock standard, inspect the lock body shape, faceplate style, backset, center distance, cylinder profile, screw positions, and door preparation. American standard locks, European mortise locks, and special regional locks are not automatically interchangeable, even when the external handle design looks similar.
American Standard vs European Standard
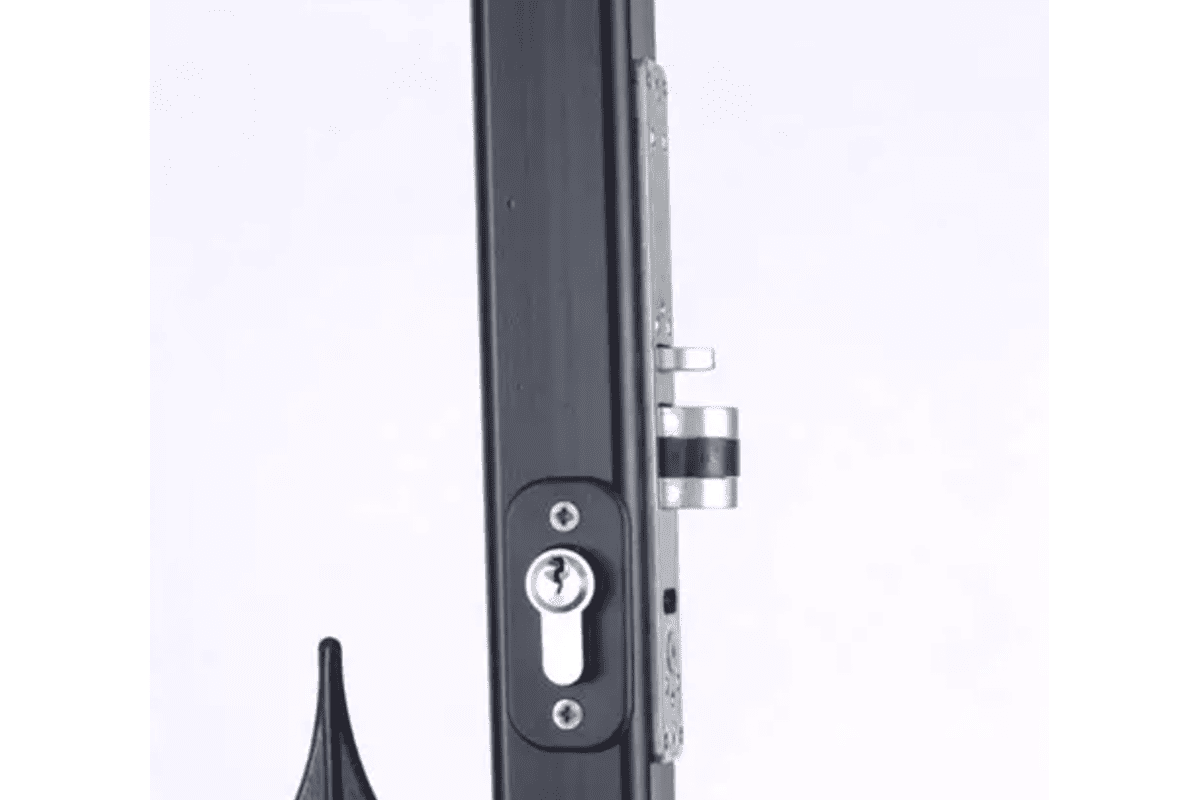
From a manufacturing point of view, “front door lock” is a broad term. It can refer to several systems. The two most common categories many buyers encounter are American standard tubular or cylindrical locks and European standard mortise locks.
They differ in how the door is prepared.
| Feature | American Standard Lock | European Standard Mortise Lock |
|---|---|---|
| Common structure | Tubular latch, deadbolt, cylindrical lock, or interconnected lock | Mortise lock body inside door edge |
| Door preparation | Round bores and edge latch holes | Rectangular mortise pocket |
| Cylinder style | Often rim, key-in-knob, key-in-lever, or deadbolt cylinder | Usually euro profile cylinder |
| Handle relationship | Handle and deadbolt may be separate | Handle and cylinder often work through one lock case |
| Replacement risk | Bore spacing mismatch | Case size, center distance, and forend mismatch |
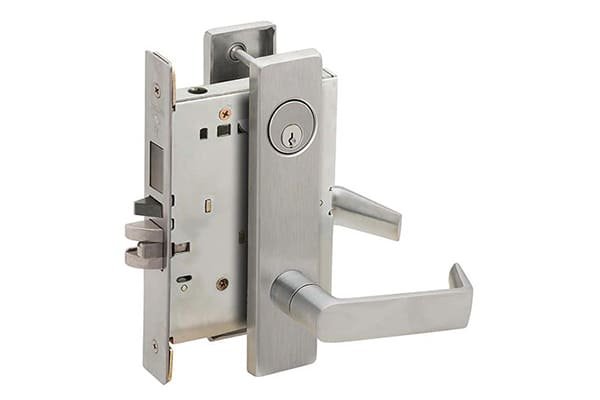
If your door has two round holes through the face of the door, it may use an American-style bored lock or deadbolt system.3 If your door edge has a long rectangular lock body inserted into a pocket, it may use a mortise lock. Many European-style front doors use a mortise lock with a euro profile cylinder.4
Look at the Door Edge
The door edge tells you a lot. I usually check these parts first:
- Forend plate shape: Is it rectangular, rounded, square-cornered, or radius-cornered?
- Forend plate size: What are the width and height?
- Latch and deadbolt position: Are they separate or integrated into one lock body?
- Screw locations: Do the screws match the new lock faceplate?
- Case depth: How deep does the lock body sit inside the door?
A lock body must fit the existing pocket unless you plan to modify the door. I do not recommend forcing a lock body into a door. Forced installation can damage the door edge, bend the lock case, weaken screw holding, and create poor alignment.
Check the Cylinder Profile
The cylinder is another standard clue. A euro profile cylinder has a recognizable oval-like profile with a cam in the center. It is common in Europe, the Middle East, and many project doors. An American deadbolt cylinder looks different and is usually part of a separate deadbolt assembly.
If the old lock uses a euro profile cylinder, you should measure the cylinder length from the center screw hole to each side. For example, a cylinder may be 30/30 mm, 35/35 mm, 40/50 mm, or another size depending on door thickness and trim.
As a manufacturer, I always advise buyers to match the system first. After that, style selection becomes much easier.
Which Lock Function Do I Need When I Change a Front Door Lock?
A replacement lock should not only fit the door. It should also perform the correct function. A front door, bedroom door, classroom door, bathroom door, and passage door can require different locking behavior.
When you change a front door lock, choose the function based on how the door must latch, lock, unlock, and operate from each side. Common functions include sashlock, passage lock, night latch, classroom lock, bathroom lock, and entrance lock. The wrong function can reduce convenience, safety, or security.
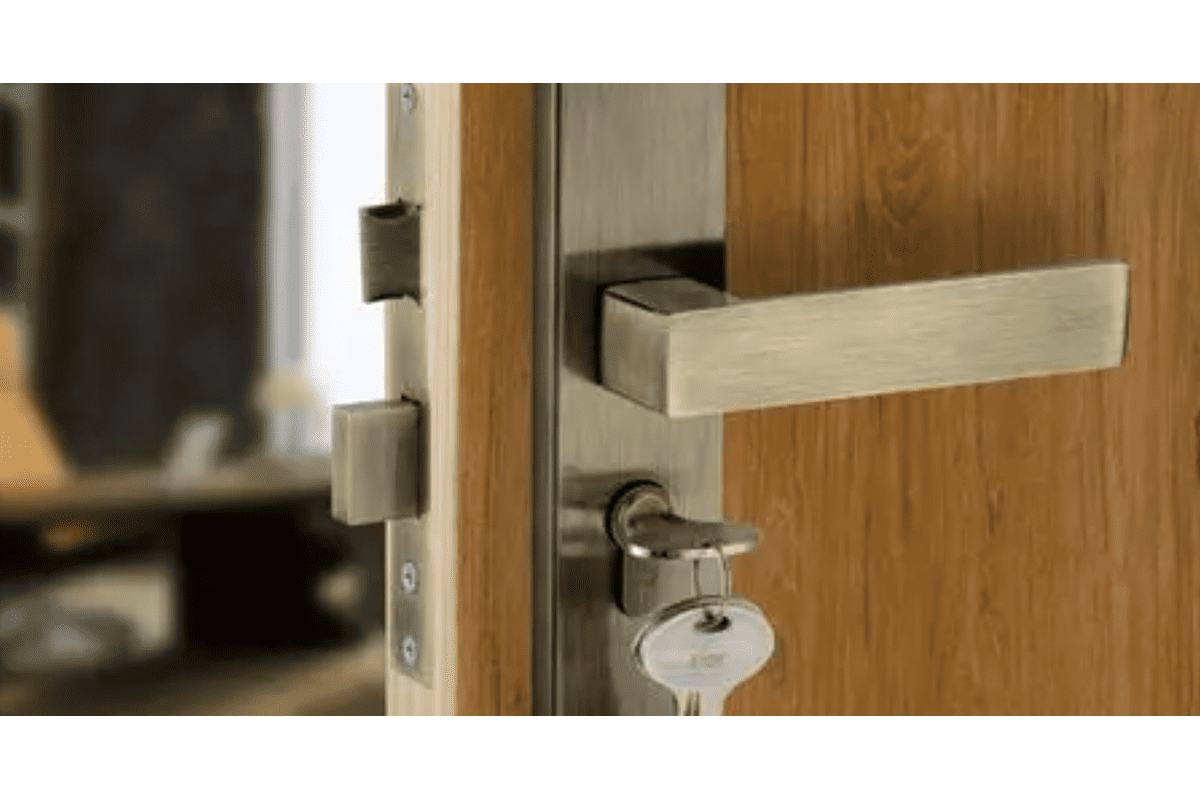
Function Comes Before Finish
Many people choose a replacement by finish first: satin nickel, black, brass, stainless steel, or antique bronze. Finish matters, especially when you want the handle, hinge, cylinder, and escutcheon to match. However, function matters more.
I usually ask one simple question:
What should each side of the door be able to do?
That question helps separate different lock types.
| Lock Function | Typical Use | Operation |
|---|---|---|
| Sashlock | Front doors, apartment doors, project doors | Latch operated by handle, deadbolt operated by key/cylinder |
| Passage lock | Hallways or non-secure doors | Latch only, no locking function |
| Night latch | Residential entrance doors | Often locks automatically or by internal operation |
| Classroom lock | Schools or controlled rooms | Usually key-controlled from outside, free egress from inside depending on specification5 |
| Bathroom/privacy lock | Bathrooms or bedrooms | Privacy locking, emergency release possible |
| Deadlock | Security-focused applications | Deadbolt only, no latch handle operation |
Why Sashlocks Are Common on Front Doors
In many European-standard systems, a front door may use a mortise sashlock. A sashlock combines a spring latch and a deadbolt in one lock body.6 The handle retracts the latch. The key cylinder operates the deadbolt. This arrangement is common because it provides daily convenience and locking security in one mechanism.
When replacing a sashlock, you must match:
- Center distance between handle follower and cylinder
- Backset from door edge to handle/cylinder centerline
- Lock case depth
- Forend dimensions
- Follower size, such as 8 mm square spindle in many systems
- Cylinder profile, such as euro profile
Do Not Replace One Function With Another Without Thinking
A passage lock may physically fit some doors, but it does not secure an entrance. A night latch may not match the same preparation as a mortise sashlock. A classroom lock may have a specific safety function that should be selected according to building requirements.
If the lock is used in a rental, public building, fire-rated door, or project door, I recommend checking local code requirements and using a qualified professional for application-specific decisions. Manufacturers can explain product compatibility, but final safety compliance depends on the door, frame, project rules, and installation conditions.
Match the Lock to Daily Use
For a normal home entrance, ask:
- Do I need a key on both sides?
- Do I need a thumb turn inside for quick exit?
- Should the latch close automatically?
- Do children, elderly users, or tenants use the door?
- Does the door need fire-rated hardware?
- Does the lock need CE or other certification documents?
For bulk buyers, I would also verify certificates, test reports, finish samples, and production consistency before placing a large order. Certifications should be treated as documents to review, not as marketing words alone.
What Measurements Matter Most When I Change a Front Door Lock?
Small measurement errors cause big replacement problems. A front door lock is a fitted component, not a universal accessory. I measure before I remove the old lock because the existing lock gives the best clues.
The most important measurements are backset, center-to-center distance, forend width, forend height, lock case depth, door thickness, cylinder length, spindle size, and strike plate position. These dimensions decide whether the new lock body, handle, cylinder, and latch will align with the existing door.
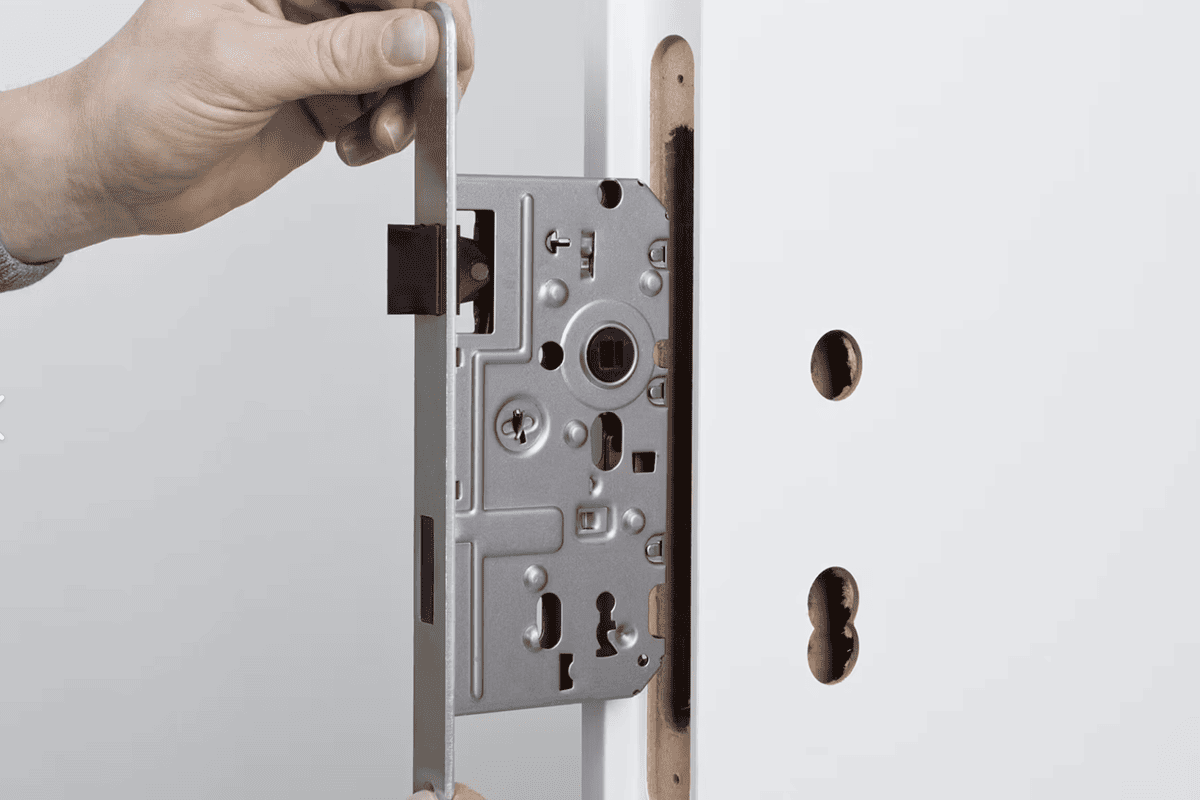
The Three Measurements I Check First
If you only remember three dimensions, remember these:
- Backset
- Center-to-center distance
- Forend size
These numbers are especially important for mortise locks and architectural door hardware.
Backset
The backset is the distance from the front edge of the door to the center of the handle spindle or key cylinder, depending on the lock type. In many mortise locks, common backsets may include 45 mm, 50 mm, 55 mm, 60 mm, or other sizes. In American-style bored locks, common backsets are often 2-3/8 inches or 2-3/4 inches7.
If the backset is wrong, the latch may not meet the strike plate. The handle may also fail to align with the existing hole.
Center-to-Center Distance
The center distance is often the distance between the handle follower center and the cylinder center. In European-style mortise locks, common distances may include 72 mm, 85 mm, 88 mm, or 92 mm8 depending on market and standard.
If this measurement is wrong, the handle and cylinder holes will not line up with the door preparation. This is one of the most common reasons a replacement mortise lock fails.
Forend Width and Height
The forend is the visible metal plate on the edge of the door. It must sit neatly in the door edge recess. Common widths may vary, such as 20 mm, 22 mm, 24 mm, or wider, depending on the lock design.
If the forend is too wide, it will not sit in the recess. If it is too narrow, it may leave visible gaps. If the screw holes do not match, you may need careful repair or new pilot holes.
Other Measurements Worth Recording
Before buying a replacement, I suggest writing down:
- Door thickness
- Lock case height
- Lock case depth
- Lock case thickness
- Latch projection
- Deadbolt projection
- Spindle size
- Handle rose or plate size
- Cylinder length
- Strike plate size
- Distance from door edge to existing screw holes
Here is a simple worksheet:
| Measurement | How to Measure | Record Yours |
|---|---|---|
| Backset | Door edge to handle/cylinder center | ___ mm / inch |
| Center distance | Handle center to cylinder center | ___ mm |
| Forend width | Width of edge faceplate | ___ mm |
| Forend height | Height of edge faceplate | ___ mm |
| Door thickness | Inside face to outside face | ___ mm |
| Cylinder length | Center screw hole to each side | / mm |
| Spindle size | Square bar width | ___ mm |
I like to take photos with a ruler beside each area. This habit saves time when comparing products with a supplier or hardware store.
How Do I Choose the Correct Cylinder Before I Change a Front Door Lock?
The cylinder controls key operation, security level, and appearance. It also affects how the lock feels every day. A cylinder that is too long, too short, or the wrong type can make a good lock body perform poorly.
To choose the correct cylinder, identify the cylinder profile, operation type, total length, inside/outside split length, cam position, key system, and security requirement. Common choices include double-side key cylinders, one-side key/one-side knob cylinders, and bathroom cylinders. The cylinder must match the lock body and door thickness.
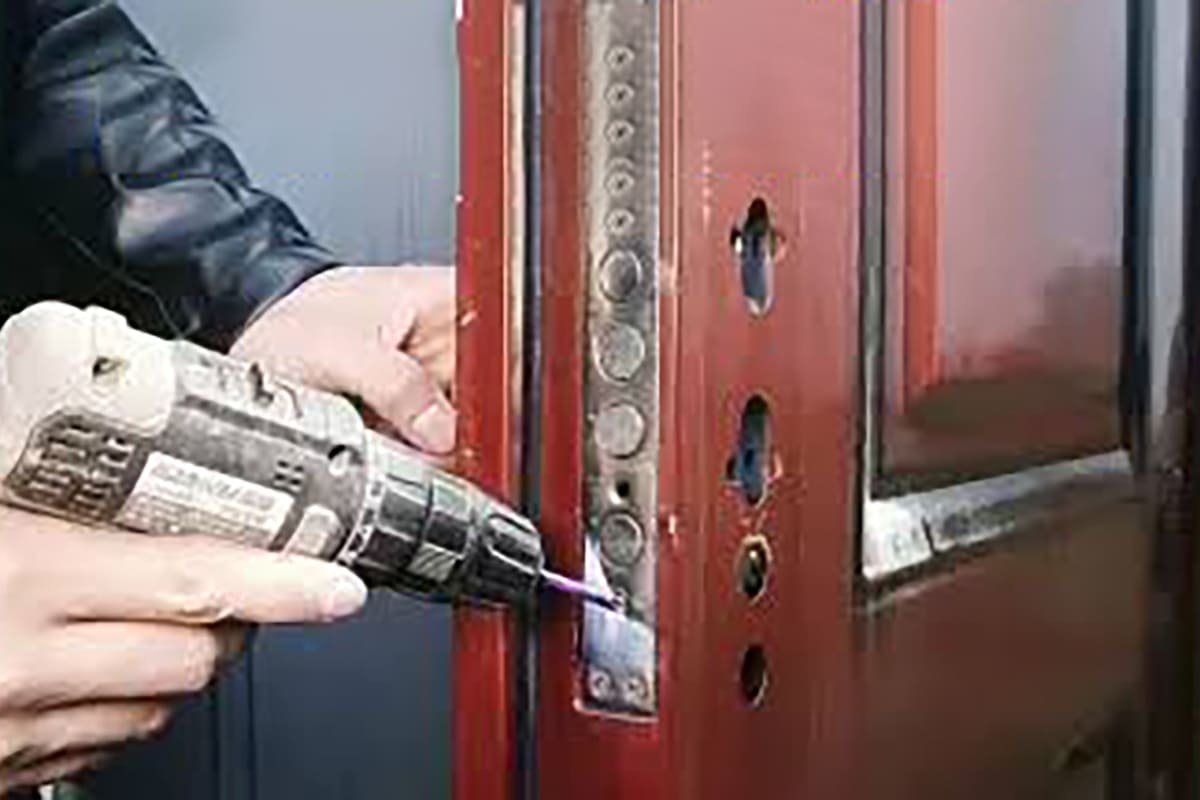
Common Cylinder Types
The correct cylinder depends on the door function and lock body. For front doors, I often see these options:
| Cylinder Type | Description | Common Use |
|---|---|---|
| Double-side key cylinder | Key operates from both sides | Doors needing key control inside and outside |
| One-side key / one-side knob cylinder | Key outside, thumb turn inside | Homes needing convenient exit |
| Bathroom cylinder | Privacy function, often with emergency release | Bathrooms or privacy rooms, not usually main entrance |
| Euro profile cylinder | Standard profile used with many mortise locks | European-standard front doors |
| Deadbolt cylinder | Used with a separate deadbolt | Many American-standard entrance doors |
Cylinder Length Is Not a Guess
For a euro profile cylinder, length is usually measured from the center fixing screw hole to each end9. A 60 mm cylinder may be 30/30 mm. A 70 mm cylinder may be 35/35 mm or 30/40 mm. The split matters because doors often have different inside and outside trim thickness.
A cylinder should usually sit close to flush with the handle plate or escutcheon. If it projects too far, it may look poor and may increase attack exposure.10 If it sits too deep, the key may be hard to insert or turn.
Choose the Operation Type Carefully
A double-side key cylinder can be useful when both sides require key control. However, some homes prefer a thumb turn inside for faster exit. That decision may be affected by local safety rules, building type, or personal preference.
A one-side key and one-side knob cylinder is convenient because you can lock and unlock from the inside without a key. However, it may not be suitable for every door design, especially if there is glass near the lock. I recommend considering the door structure and getting qualified advice when security or fire safety is important.
Check Security Features
Cylinder specifications may include:
- Anti-pick pins
- Anti-drill protection
- Anti-snap design
- Master key system compatibility
- Keyed alike options
- Restricted keyway options
- Brass body or zinc alloy body
- Nickel, brass, black, or other finish
As a manufacturer, I see cylinder choice as part of the whole hardware package. A strong lock body with a low-grade cylinder may not meet the buyer’s security expectations. A high-security cylinder in a poorly fitted door may also disappoint. The best result comes from matching the door, lock body, cylinder, handle set, strike plate, and installation quality.
What Is the Correct Order to Change a Front Door Lock?
Once the lock standard, function, measurements, and cylinder type are confirmed, the actual replacement becomes much easier. The order matters because each part supports alignment for the next part.
The correct order is to remove the old cylinder first, then remove the handles, then remove the lock body. Install the new lock body first, then install the handles, then install the cylinder. Test latch movement, deadbolt locking, key rotation, handle return, and door closing before fully tightening all screws.
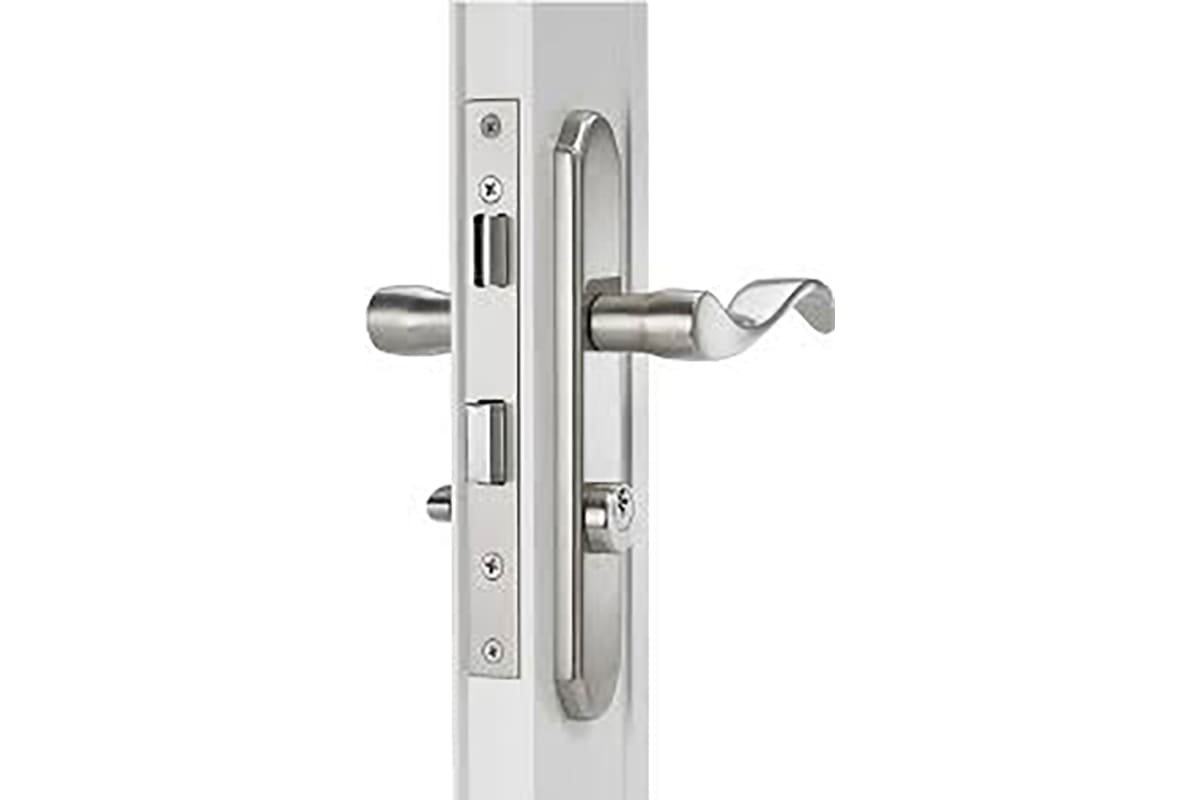
Tools You May Need
Most basic replacements use common tools. However, tools depend on the lock type and door condition.
You may need:
- Phillips screwdriver
- Flat screwdriver
- Hex key
- Measuring tape or caliper
- Pencil
- Small container for screws
- Camera or phone
- Wood chisel only if minor fitting is required
- Drill only if new pilot holes are necessary
Step 1: Keep the Door Open
Keep the door open while working. This prevents accidental lockout. I also like to place a wedge under the door so it does not move while I remove parts.
Before removing anything, take photos of:
- Inside handle
- Outside handle
- Cylinder area
- Door edge
- Strike plate
- Screw positions
These photos help if you need to compare parts later.
Step 2: Remove the Old Cylinder
For many euro profile cylinders, open the door and find the long fixing screw on the lock forend. Remove that screw. Insert the key and turn it slightly to align the cam. Then slide the cylinder out.
Step 3: Remove the Handles
Next, remove the handle screws, escutcheons, roses, or long plates. Some handles have hidden grub screws under the lever. Loosen them carefully.
Step 4: Remove the Lock Body
After the cylinder and handles are removed, unscrew the forend screws on the door edge. Pull the lock body out carefully. If paint holds it, score around the forend gently instead of prying aggressively.
Compare the old and new lock bodies before installation:
| Compare | Must Match? | Why |
|---|---|---|
| Backset | Yes | Aligns latch and handle |
| Center distance | Yes | Aligns handle and cylinder |
| Forend size | Usually yes | Fits door edge recess |
| Case depth | Yes | Fits mortise pocket |
| Latch direction | Must be correct or reversible | Door must close properly |
| Screw positions | Preferably yes | Easier installation |
Step 5: Install the New Lock Body First
Insert the new lock body into the door edge. Do not fully tighten the screws yet. First, check that the latch faces the correct direction. Many latches are reversible, but the method depends on the lock design.
The lock body should slide in without force. If it does not fit, stop and recheck dimensions. A forced lock body can bind internally.
Step 6: Install the Handles
Insert the spindle through the follower. Fit the handles or plates. Tighten screws lightly at first. Test handle movement before final tightening.
The handle should:
- Move smoothly
- Return to horizontal position
- Retract the latch fully
- Avoid rubbing the plate
- Sit level on both sides
If the handle binds after tightening, the plates may be misaligned or the spindle may be under pressure.
Step 7: Install the Cylinder
Slide the cylinder into position. Turn the key slightly if needed so the cam aligns. Install the fixing screw through the forend. Do not overtighten because it can distort alignment.
Step 8: Test Before Final Tightening
Before fully tightening every screw, test:
- Door open, handle down
- Door open, latch return
- Door open, key locking
- Door open, key unlocking
- Door closed, latch engagement
- Door closed, deadbolt engagement
- Door closed, key operation from both sides
- Handle return after closing
If anything feels tight, adjust before final tightening. A front door lock should not need force to operate.
When Should I Call a Professional Instead of Changing a Front Door Lock Myself?
Some lock replacements are simple. Others involve safety, compliance, or door modification. I believe a careful homeowner can handle many like-for-like replacements, but not every door should be treated as a DIY project.
Situations That Need Extra Care
I recommend professional help in these cases:
- The front door is your only entrance.
- The lock is jammed with the door closed.
- The door is fire-rated or part of a certified assembly.11
- The building is a rental, hotel, school, office, or public project.
- The new lock requires major cutting.
- The frame strike position must be moved significantly.
- The door is steel, aluminum, composite, or reinforced.
- The lock uses access control or an electric strike.
- The key system is master-keyed.
- Local code requirements apply.
For certified products, buyers should verify documents such as:
- CE certificate
- Fire-rated certificate
- Test report
- Product marking
- Factory quality documentation
- Scope of certificate
- Applicable standard and rating duration
At SDH Hardware, we manufacture architectural door hardware for global buyers, including mortise locks, concealed hinges, butt hinges, lever handles, and cylinders. From that perspective, I can explain compatibility and product matching. However, final project approval should always follow local regulations and qualified professional evaluation.
When DIY Still Makes Sense
A DIY replacement may be reasonable when:
- The new lock is the same standard.
- All dimensions match.
- The function is the same.
- The door preparation is clean.
- No fire rating or project compliance issue applies.
- You can test the door safely before relying on it.
Conclusion
Knowing how to change a front door lock is really about matching the right parts before using the screwdriver. First identify the lock standard, function, backset, center distance, forend size, cylinder type, and cylinder length. Then remove the old cylinder, handles, and lock body in order. Install the new lock body first, then the handles, then the cylinder. If you need reliable mortise locks, cylinders, handles, hinges, or OEM door hardware support, contact SDH Hardware for specification-based sourcing and manufacturing guidance.
"SECTION 087111 - DOOR HARDWARE (SCHEDULED BY ...", https://fpm.usc.edu/wp-content/uploads/2021/11/087101-USC-UPC-door-hardware-Guide-Specification_1.pdf. Door-hardware standards such as ANSI/BHMA specifications treat lock function, door preparation, backset, door thickness, cylinder configuration, and strike alignment as specification variables that affect whether a lockset can be installed and operate correctly; this support is contextual rather than a validation of every measurement in the checklist. Evidence role: general_support; source type: institution. Supports: Door-hardware standards and technical guidance identify lock function, door preparation, backset, door thickness, cylinder type, and strike alignment as relevant compatibility variables.. Scope note: The source would support the relevance of the categories generally, not prove that this exact checklist is exhaustive for every regional lock system. ↩
"SECTION 087111 - DOOR HARDWARE (SCHEDULED BY ...", https://fpm.usc.edu/wp-content/uploads/2021/11/087101-USC-UPC-door-hardware-Guide-Specification_1.pdf. Technical door-hardware guidance defines backset as the distance from the door edge to the lock or latch centerline, which determines the latch or bolt position relative to the strike plate. Evidence role: mechanism; source type: institution. Supports: Backset is the distance from the door edge to the lock centerline, and it determines where the latch or bolt meets the frame strike.. ↩
"How to Bore Holes for Deadbolt, Doorknob and Latch Install ...",
. Door-hardware preparation references describe bored locksets and deadbolts as using circular face bores, together with edge bores for the latch or bolt, which supports using round holes as a clue to lock type. Evidence role: definition; source type: institution. Supports: Bored lock and deadbolt installations commonly use round face bores and edge bores as part of standard door preparation.. Scope note: The source would support the general identification method but would not prove that every door with two round holes follows a specific national standard. ↩"Pin tumbler lock - Wikipedia", https://en.wikipedia.org/wiki/Pin_tumbler_lock. Reference sources describe the euro profile cylinder as a cylinder format widely used in European door-lock systems, including mortise lock applications; this supports the regional context but does not quantify its market share in front doors. Evidence role: general_support; source type: encyclopedia. Supports: Euro profile cylinders are widely associated with European lock systems and are commonly used with mortise locks.. Scope note: The support is contextual and does not establish exact prevalence across all European countries or door types. ↩
"Classroom Function Security Upgrades: Mechanical and ...", https://www.locksmithledger.com/locks/article/12041482/classroom-function-security-upgrades-mechanical-and-electromechanical. BHMA-style lock-function definitions describe classroom functions as locks controlled by key from the outside while permitting inside operation for egress, subject to the exact lock function and applicable code requirements. Evidence role: definition; source type: institution. Supports: Classroom lock functions are defined by outside key control and inside operation that permits egress under specified conditions.. Scope note: The source would support the general function category, while the exact egress requirements depend on the specific lock function and local building code. ↩
"Mortise lock - Wikipedia", https://en.wikipedia.org/wiki/Mortise_lock. Door-hardware glossaries define a sashlock as a mortise lock that contains both a latch bolt operated by a handle and a deadbolt operated by a key or cylinder. Evidence role: definition; source type: institution. Supports: A sashlock includes both a latch mechanism and a locking bolt within one lock case.. ↩
"10X Line", https://www.sargentlock.com/en/products/bored-locks/10x-line/. Door-hardware standards and installation references commonly specify 2-3/8 inch and 2-3/4 inch backsets for bored locksets, supporting these dimensions as typical options in American-style door preparation. Evidence role: general_support; source type: institution. Supports: 2-3/8 inch and 2-3/4 inch are standard or common backset dimensions for bored residential locksets.. Scope note: The source would support common U.S. bored-lock dimensions but not guarantee that every American-market product uses only these backsets. ↩
"How to measure and choose the right mortise lock size - BlueID", https://www.blue-id.com/en/blog/mortise-lock-mass. European mortise-lock standards and technical references identify metric handle-to-cylinder center distances, including commonly encountered values such as 72 mm and 92 mm; this supports the dimensional context but not the universality of every value listed. Evidence role: general_support; source type: institution. Supports: European mortise lock specifications commonly use metric center distances such as 72 mm and 92 mm, with other regional variants.. Scope note: The source may directly support some listed values while treating others as regional or product-specific variants. ↩
"How to Measure a Euro Cylinder - Lock & Key", https://www.lockandkey.co.uk/euro-locks/how-to-measure-a-euro-cylinder?srsltid=AfmBOoom1_VDrMJOFr72Eb1KMUEImqgVWHmc3rfs0u-MG2ZK27D05gux. Technical guidance for euro profile cylinders specifies cylinder length as split measurements taken from the central fixing screw position to each end, such as 30/30 mm or 35/45 mm. Evidence role: definition; source type: institution. Supports: Euro profile cylinders are specified by split lengths measured from the central fixing screw or cam area to each end.. ↩
"What is Lock Snapping with Prevention Tips (Expert Advice)", https://www.locksmiths.co.uk/faq/lock-snapping/. Police and security guidance on euro cylinders notes that excessive projection beyond the door furniture can expose the cylinder to physical attack methods such as gripping or snapping, supporting the security relevance of flush or near-flush fitting. Evidence role: mechanism; source type: government. Supports: Excessive cylinder projection can make the cylinder more exposed to gripping, snapping, or other physical attacks.. Scope note: The source would support the attack-exposure mechanism, while actual risk depends on the cylinder design, escutcheon, door construction, and attack method. ↩
"[PDF] Alterations to Fire Door Assemblies - I Dig Hardware", https://idighardware.com/wp-content/uploads/2014/10/Decoded-Dec14-Alterations-to-Fire-Doors.pdf. Fire-door standards such as NFPA 80 treat doors, frames, locks, latches, and related hardware as parts of a rated assembly and limit field modifications unless they comply with the applicable listing and inspection requirements. Evidence role: expert_consensus; source type: institution. Supports: Fire-door assemblies are regulated systems, and changes to locks or hardware may need to comply with applicable fire-door standards and listing requirements.. ↩