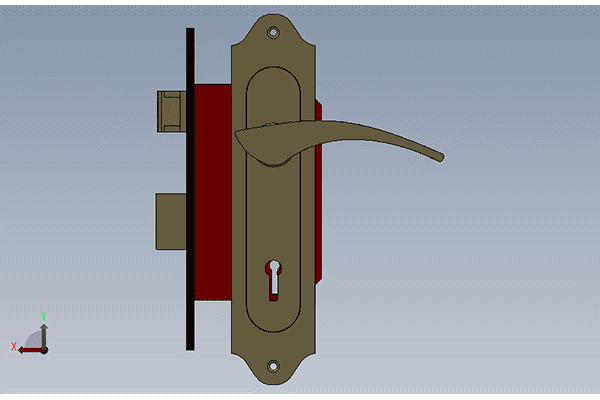
How to Fix a Mortise Door Lock?
A mortise door lock can fail in several different ways, and the wrong repair can waste time or make the door harder to use. I often see buyers treat every fault as a cylinder problem. The safer solution is to identify the failed function first, then decide whether maintenance, part repair, or full lock body replacement makes sense.
To fix a mortise door lock, diagnose the failed function first: latch rebound, key turning, handle transmission, or privacy/deadlocking. Clean and lubricate only when the problem is light friction or dust. If springs, pins, linkages, or transmission parts are broken or worn, replace the lock body with a correctly matched model.
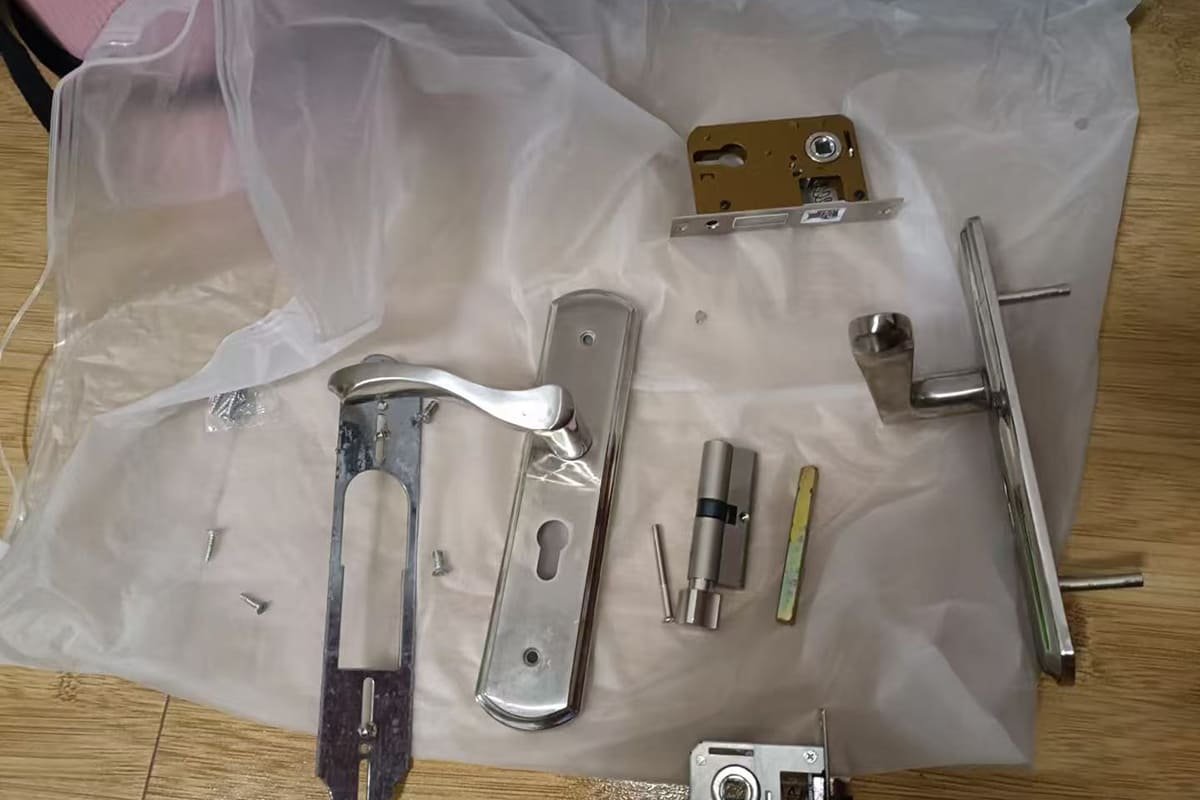
I manufacture mortise locks, so I look at failures from the inside out. A lock body is not just a box in the door. It contains springs, pins, followers, latch parts, deadbolt parts, and transmission linkages that must work together smoothly.1
How Do I Diagnose a Mortise Door Lock Before Repairing It?
A mortise door lock problem becomes confusing when the symptom is not separated from the cause. A handle may feel loose, but the real issue may be the spindle, follower, spring, or latch linkage. If I diagnose by symptom first, I can avoid replacing the wrong part.
A mortise door lock should be diagnosed by checking four functions: latch movement, handle operation, key operation, and privacy or deadlocking action.2 Each failed function points to a different possible cause, such as a broken spring, fallen pin, jammed linkage, worn follower, misaligned cylinder, or damaged internal mechanism.
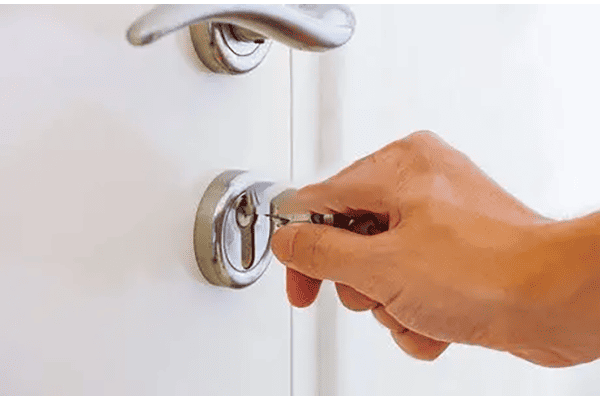
Start With the Failed Function
When I check a faulty lock body, I do not start by adding oil. I start by asking one question:
Which function failed first?
That question matters because a mortise lock body has several working systems inside one casing.
Here is a practical diagnostic table I use when discussing lock issues with buyers and maintenance teams:
| Symptom | Possible Cause | First Check | Likely Fix |
|---|---|---|---|
| Latch does not rebound | Weak spring, broken spring, fallen pin, dirt inside latch channel | Press latch by hand with door open | Clean if light friction; replace lock body if spring or pin failed |
| Handle moves but latch does not retract | Square spindle issue, worn follower, broken transmission part | Check spindle fit and handle alignment | Refit spindle or replace lock body |
| Key will not turn | Cylinder issue, deadbolt jam, internal obstruction, incorrect cylinder position | Test cylinder outside the lock if possible | Replace cylinder or lock body depending on cause |
| Key turns but bolt does not move | Worn cam contact, damaged deadbolt linkage, internal wear | Watch bolt movement with faceplate visible | Usually replace lock body |
| Privacy turn does not work | Stuck mechanism, spring issue, misaligned thumb turn | Test with door open | Adjust parts or replace lock body |
| Door will not close | Wrong latch bevel direction, strike plate misalignment, incorrect lock position | Check latch slope and strike plate | Reinstall correctly or adjust strike |
Check the Latch First
The latch is the part that enters the strike plate when the door closes.3 If the latch does not rebound, I usually suspect one of these problems:
- Dust or paint buildup around the latch
- Dry friction inside the latch channel
- A loose or broken spring
- A fallen internal pin
- A bent latch or damaged latch guide
A simple check helps. I keep the door open and press the latch by hand. If the latch moves smoothly and rebounds quickly, the lock body may be fine, and the issue may be the strike plate or door alignment. If the latch feels sticky, cleaning may help. If it sinks in and does not return, the internal spring or pin may have failed.
Check the Handle Transmission
Most mortise door locks use a square spindle to transmit handle movement into the lock body.4 When the handle rotates, the spindle turns the follower inside the lock body. The follower then pulls the latch linkage.
If the handle moves freely but the latch does not move, I check:
- Whether the square spindle is inserted fully.
- Whether the spindle size matches the follower hole.
- Whether the handle panels are installed too tightly or unevenly.
- Whether the follower inside the lock body is worn or cracked.
- Whether the latch transmission linkage has failed.
This is one reason I do not blame every handle problem on the handle itself. In many cases, the lock body’s internal follower is the real problem.
Check the Key and Cylinder Without Guessing
A key problem can come from the cylinder, but it can also come from the lock body. For example, the cylinder may turn correctly outside the lock, but the deadbolt linkage inside the lock body may be jammed.
I usually separate the fault like this:
- If the key does not enter or turn in the cylinder, the cylinder may be damaged, dirty, or incorrectly keyed.5
- If the cylinder turns outside the lock but not inside, the lock body may be jammed or misaligned.
- If the key turns but the deadbolt does not move, the internal deadbolt transmission may be worn or broken.
This step is especially important for buyers who manage after-sales issues across many projects. A wrong diagnosis can lead to unnecessary cylinder replacement while the real lock body fault remains.
When Can a Mortise Door Lock Be Cleaned or Lubricated?
A mortise door lock can often be maintained when the problem is light sticking, dust, minor friction, or dry movement. However, lubrication is not a universal repair. If the internal spring, follower, pin, or deadbolt linkage is damaged, lubricant will only hide the issue for a short time.
Cleaning and lubrication are suitable when the latch, handle, or bolt still works but feels rough, slow, or slightly sticky. They are not enough when the latch does not rebound, the handle fails to retract the latch, the key turns without bolt movement, or the same failure repeats after maintenance.
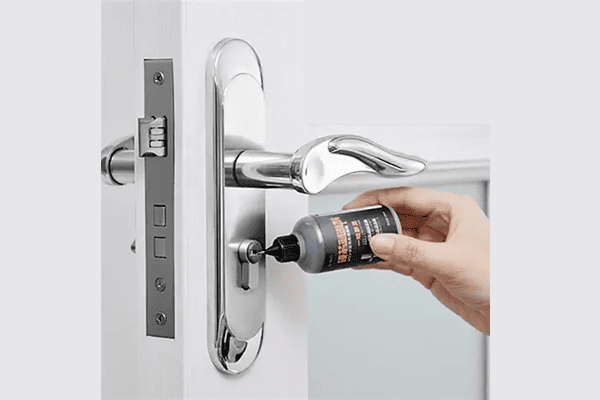
Use Maintenance Only for Light Friction
I see one common mistake in repair advice: “just add lubricant.” That advice is too simple for a mortise lock. A lock body contains precision contact points, but it also contains parts that can break, deform, or wear out. Oil cannot rebuild a broken spring.
Maintenance is reasonable when the lock shows these signs:
- The latch rebounds, but slowly.
- The handle works, but feels slightly rough.
- The key turns, but the movement feels dry.
- The bolt moves, but not as smoothly as before.
- The lock has been exposed to dust, renovation debris, or long storage.
In these cases, I clean around the latch, faceplate, cylinder opening, and visible moving parts. I avoid forcing thick grease into the lock body because excessive grease can trap dust over time.6 For many standard architectural locks, a small amount of suitable lock lubricant is enough.
Practical Cleaning Steps
For maintenance-related sticking, I normally suggest this sequence:
- Open the door and test the lock without pressure from the strike plate.
- Wipe the latch and faceplate with a clean cloth.
- Remove dust or paint residue around the latch hole and strike plate.
- Apply a small amount of suitable lubricant to moving contact points.
- Operate the handle and key several times to distribute the lubricant.
- Retest with the door open, then retest with the door closed.
This process helps separate a lock body fault from a door alignment fault. If the lock works well with the door open but fails when closed, the strike plate, door gap, or latch position may be the issue.
Know the Limit of Lubrication
Lubrication should not be used to excuse unstable performance. If a lock needs frequent oiling to work, I treat that as a warning sign. A stable mortise lock should not require constant emergency maintenance.
Here are signs that cleaning is not enough:
- The latch remains inside the lock body after being pressed.
- The handle drops or does not return.
- The spindle turns but does not drive the latch.
- The key turns loosely without moving the deadbolt.
- The privacy turn feels disconnected.
- The lock works once, then fails again after several cycles.
- Metal dust or broken pieces appear near the lock body.
For B2B buyers, this distinction matters. A door factory or wholesaler may manage hundreds or thousands of installed locks. If the failure is caused by internal wear, repeated lubrication creates after-sales cost and customer complaints. In that case, replacement is usually more reliable than repeated maintenance.
When Should I Replace the Mortise Door Lock Body?
A mortise door lock body should be replaced when the internal parts are broken, worn, unstable, or unsafe to rely on. I recommend replacement when springs fail, linkages jam repeatedly, the follower wears out, the deadbolt transmission becomes unreliable, or the lock has repeated functional failure after basic maintenance.
Replacement is the safer option when a mortise door lock has serious internal damage, repeated jamming, broken springs, worn handle transmission parts, or unreliable deadlocking. Cleaning may solve minor friction, but a damaged lock body can affect door closing, access control, privacy, and long-term project performance.
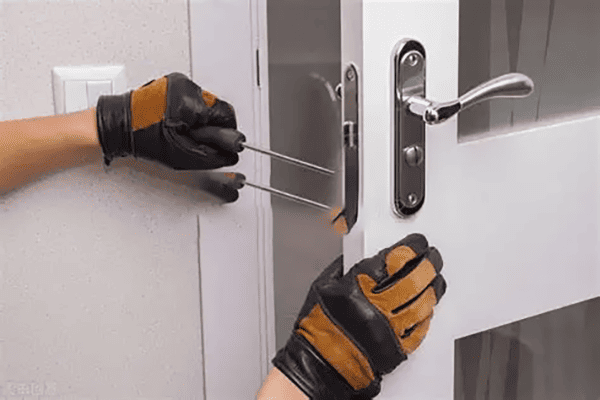
Replace When the Internal Mechanism Is No Longer Stable
As a manufacturer, I think about lock failure in terms of risk. A small sticking issue is a maintenance problem. A failed spring or worn transmission part is a reliability problem.
A mortise lock body should usually be replaced when these problems appear:
- Broken latch spring: The latch does not rebound.
- Loose or fallen internal pin: The latch or bolt movement becomes unstable.
- Worn follower: The handle turns but the latch response is weak or missing.
- Broken linkage: The handle or key moves, but the latch or deadbolt does not.
- Jammed deadbolt: The key cannot move the bolt smoothly.
- Failed privacy function: The thumb turn or privacy mechanism does not engage.
- Repeated failure: The lock works after adjustment but fails again quickly.
I have seen project buyers try to repair these problems at part level. That may be possible in a factory repair environment, but it is not always practical on site. Many mortise lock bodies are riveted, crimped, or not designed for repeated field disassembly.7 If the lock is used in a commercial project, hotel, apartment, or export door set, full lock body replacement is often more controlled.
Replacement Is Not Only About the Lock
A lock body replacement must also consider the door, cylinder, handle, and strike plate. If the new lock body does not match the old one, the repair can create new problems.8
Before replacing the lock body, I check:
| Matching Point | Why It Matters |
|---|---|
| Lock body length | It must fit the mortise pocket in the door |
| Lock body width/depth | It must not be too deep or too shallow |
| Faceplate size | It must cover the existing door cutout |
| Screw-hole distance | Existing fixing holes should align where possible |
| Backset | Handle and cylinder positions must match the door preparation |
| Center distance | Handle-to-cylinder distance must match panels and escutcheons |
| Latch direction | The latch bevel must face the correct closing direction |
| Cylinder type | Euro profile, oval, or other cylinder type must match |
| Spindle size | The square spindle must fit the follower correctly |
Do Not Ignore the Latch Bevel Direction
The latch bevel direction is a small detail that causes big installation problems. The sloped side of the latch must face the strike plate correctly as the door closes.9 If the latch slope faces the wrong way, the door may hit the latch instead of pushing it inward.
Some lock bodies have a reversible latch. Others must be ordered in the correct hand or adjusted before installation. When I support buyers with model matching, I always ask for photos of:
- The old lock body faceplate
- The latch direction
- The door edge
- The handle side
- The lock installed in the door, if available
This is not just convenience. A photo often prevents a wrong shipment, especially when buyers source locks for different markets with different door standards.
Consider Compliance and Project Requirements
For fire-rated or certified door sets, I take a more careful approach. Certifications should be verified as documents for the specific product, configuration, and project requirement. A replacement lock body should not be chosen only by appearance.
If the door is part of a regulated project, I recommend qualified professional evaluation before changing hardware. The lock body, door leaf, frame, hinges, seals, and installation method can all affect performance.10 As a manufacturer, I can help match lock specifications and supply documentation, but final project suitability should be verified by the responsible professional or testing requirement.
How Do I Match and Install a Replacement Mortise Door Lock?
A mortise door lock replacement should be matched before installation by measuring the old lock body and confirming the door preparation. I check the lock body size, screw-hole distance, backset, center distance, faceplate, latch direction, spindle size, and cylinder type before recommending a compatible model.
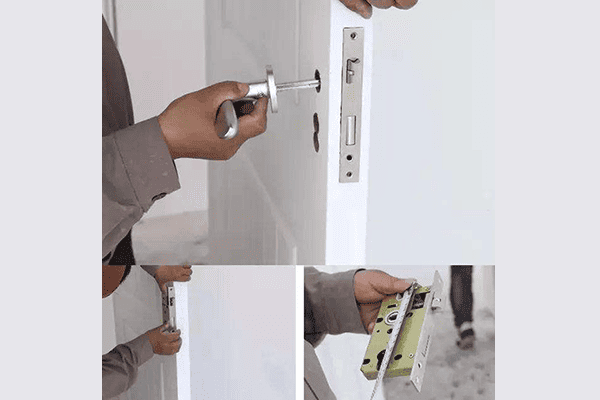
To install a replacement mortise door lock, remove the cylinder screw and cylinder, remove the handle panels and square spindle, unscrew the faceplate, pull out the old lock body, insert the matched new body, then reinstall the spindle, handles, and cylinder. Test all functions before fully tightening screws.
Measure Before You Buy
I always tell buyers not to order a replacement lock body based only on a product name. “Mortise lock” is a category, not a complete specification. Two lock bodies can look similar but have different backsets, center distances, faceplate sizes, or screw-hole positions.
At minimum, I ask for these dimensions:
- Lock body length
- Lock body width or depth
- Faceplate length and width
- Distance between faceplate screw holes
- Backset — distance from door edge to handle spindle center
- Center distance — distance from handle spindle center to cylinder center
- Follower size — square spindle hole size
- Cylinder profile and length
- Latch and deadbolt layout
- Door thickness
Photos are also very helpful. A clear photo of the old lock body beside a ruler can save several emails. A photo of the door edge and handle position can confirm whether the latch direction and faceplate match.
Removal Sequence
The correct removal sequence reduces damage to the door and hardware. I usually follow this order:
- Open the door and keep it stable.
- Remove the cylinder fixing screw from the lock faceplate.
- Pull out the cylinder by turning the key slightly if needed.
- Remove the handle panels, roses, or escutcheons.
- Pull out the square spindle.
- Unscrew the lock body faceplate screws.
- Slide the old lock body out from the door edge.
If the lock body does not slide out easily, I do not force it with heavy impact. Paint, wood swelling, or tight door machining may hold it in place. Gentle loosening is better than damaging the mortise pocket.
Installation Sequence
Installation is the reverse process, but testing matters at each stage:
- Insert the new matched lock body into the mortise pocket.
- Lightly tighten the faceplate screws but do not fully lock them down yet.
- Insert the square spindle through the follower.
- Install the handle panels loosely.
- Insert the cylinder and align the cam.
- Install the cylinder fixing screw.
- Test the handle, latch, key, deadbolt, and privacy function.
- Adjust alignment if needed.
- Fully tighten all screws only after smooth operation is confirmed.
This “test before final tightening” habit prevents many problems. If screws are tightened too early, the panels can compress unevenly, the spindle can bind, or the cylinder can sit under tension. Any of these issues can make a new lock feel defective even when the lock body is correct.
Test With the Door Open First
I always test the lock with the door open before testing it with the door closed.11 This separates lock function from door-frame alignment.
With the door open, I test:
- Handle down: latch retracts smoothly.
- Handle release: latch rebounds fully.
- Key turn: deadbolt extends and retracts smoothly.
- Privacy turn: privacy or deadlocking function engages correctly.
- Cylinder: key can be removed at the correct position.
- Latch bevel: slope faces the correct closing direction.
Then I test with the door closed. If the lock works open but not closed, I check the strike plate position, door gap, hinge sag, and frame alignment.
For bulk buyers, I suggest documenting this test process for installers and after-sales teams. A simple checklist can reduce false defect claims and help separate product quality issues from installation issues.
Frequently Asked Questions
Can I fix a mortise door lock by only adding lubricant?
You can fix minor sticking with cleaning and a small amount of suitable lubricant, but lubricant will not repair broken springs, worn followers, fallen pins, or damaged linkages. If the same mortise door lock fails repeatedly after lubrication, I would treat it as an internal mechanical issue.
Why does my mortise door lock handle move but the latch does not retract?
The square spindle may be loose, too short, or mismatched. The handle panels may also be misaligned. If those parts are correct, the internal follower or latch linkage inside the mortise lock body may be worn or broken, which usually means the lock body should be replaced.
How do I know if the cylinder or the lock body is the problem?
Test the cylinder separately if possible. If the key does not enter or turn, the cylinder may be faulty. If the cylinder turns normally outside the lock but fails inside, the mortise lock body, deadbolt linkage, or installation alignment may be the real cause.
What measurements do I need before replacing a mortise lock body?
Measure the lock body length, width, faceplate size, screw-hole distance, backset, center distance, spindle size, cylinder type, and door thickness. I also recommend sending clear photos of the old lock body, door edge, latch direction, and installed handle position before purchase.
Why does the door not close after I replace the mortise lock?
The latch bevel may face the wrong direction, or the strike plate may not align with the latch. The lock body may also be the wrong size or backset. I always test the latch direction and lock function before fully tightening the screws.
Conclusion
To fix a mortise door lock, I start with diagnosis, not guesswork. I check the latch, handle transmission, key operation, and privacy or deadlocking function before deciding on maintenance or replacement. Cleaning and lubrication help only with light friction. Broken springs, worn linkages, unstable followers, and repeated failures usually require a matched lock body replacement. If you need help matching a replacement model, send SDH Hardware clear photos and key dimensions, and I can help you review the correct specifications.
"Mortise lock", https://en.wikipedia.org/wiki/Mortise_lock. A general reference on mortise locks describes them as locksets installed into a pocket in the door and consisting of coordinated latch, bolt, cylinder, and handle-operated components. Evidence role: definition; source type: encyclopedia. Supports: A neutral source should describe mortise locks as locksets fitted into a mortise and identify common components such as latch bolts, deadbolts, cylinders, and handle-operated mechanisms.. Scope note: The source may define common mortise-lock architecture rather than verify every component listed in this specific product design. ↩
"Fix Door Handle Will Not Open Door: Quick Solutions & ...", https://imba.missouri.edu/door-handle-will-not-open-door-4234209582.html. Facilities-maintenance guidance for door hardware commonly treats latch operation, lever or spindle action, cylinder function, and bolt engagement as separate diagnostic areas when evaluating lock faults. Evidence role: general_support; source type: education. Supports: A technical or facilities-maintenance source should support separating door-lock troubleshooting into latch operation, lever or spindle operation, cylinder/key operation, and bolt or locking function.. Scope note: Such guidance would support the diagnostic framework generally, not the author's exact four-category wording. ↩
"Lockset", https://en.wikipedia.org/wiki/Lockset. Door-hardware references define the latch bolt as the projecting part of a lock or latch that engages the strike plate or strike opening to hold the door in the closed position. Evidence role: definition; source type: encyclopedia. Supports: A source should define a latch or latch bolt as the projecting component that engages a strike plate or strike opening to keep a door closed.. ↩
"What is a Spindle and what kind do I need? - Our Blog", https://www.morehandles.co.uk/blog/more-handles-technical-guides-what-is-spindle-and-how-do-i-know-what-kind-i-need/. Architectural-hardware references describe the square spindle as the shaft connecting the lever or knob to the lock follower, allowing handle rotation to actuate the latch mechanism. Evidence role: mechanism; source type: institution. Supports: A door-hardware reference or standards source should explain that a square spindle passes through the follower or hub so the handle can retract the latch.. Scope note: The source would support the common mechanism, while individual mortise-lock designs may use different spindle dimensions or configurations. ↩
"Key not turning ignition lock cylinder", https://www.facebook.com/groups/56999644680/posts/10156693298029681/. Lock-maintenance references identify contamination, mechanical wear or damage, and keying mismatch as common cylinder-level causes when a key will not enter or rotate properly. Evidence role: general_support; source type: institution. Supports: A neutral technical source should identify dirt, wear, damage, or incorrect keying as common reasons a key may not enter or rotate in a lock cylinder.. Scope note: This supports general diagnosis of cylinder symptoms, not a definitive diagnosis for any individual lock. ↩
"Don't put up with locks that stick. Use 3-IN-ONE® Lock Dry Lube to dissolve ...", https://www.facebook.com/Original3INONEOil/posts/dont-put-up-with-locks-that-stick-use-3-in-one-lock-dry-lube-to-dissolve-build-u/1167825385560842/. Lock-maintenance guidance notes that excessive or unsuitable lubricant can retain dust and debris inside a lock mechanism, which may contribute to sticking or impaired operation over time. Evidence role: mechanism; source type: institution. Supports: A maintenance source should explain that excessive or inappropriate lubrication can retain dust and debris in lock mechanisms, increasing friction or sticking.. Scope note: The source would support the mechanism generally and may not test the specific lubricant or mortise-lock model discussed in the article. ↩
"Historic Mortise Lock Repair—Getting Your Historic Hardware Working",
. Technical locksmithing materials note that some lock cases are factory-assembled or otherwise not intended for repeated field disassembly, making complete lock-body replacement a practical service option in many settings. Evidence role: general_support; source type: education. Supports: A technical locksmithing or training source should support that certain lock cases are factory-assembled or not intended for repeated field disassembly, limiting practical on-site repair.. Scope note: This is contextual support; serviceability varies by manufacturer, model, and local repair practice. ↩"How to measure and choose the right mortise lock size", https://www.blue-id.com/en/blog/mortise-lock-mass. Architectural-hardware references emphasize that replacement locksets must correspond to the door preparation and hardware dimensions, including backset, faceplate, spindle or follower size, and cylinder or lever locations. Evidence role: general_support; source type: institution. Supports: A standards or architectural-hardware source should support that replacement locksets must match relevant dimensions such as backset, faceplate, spindle/follower, cylinder position, and door preparation.. Scope note: The source would support dimensional compatibility generally, not confirm compatibility for a specific replacement model. ↩
"Doorknob Installation Secrets From A Pro (How To)",
. Door-hardware installation guidance explains that the beveled face of the latch should be oriented toward the strike or closing direction so that contact with the strike depresses the latch during closing. Evidence role: mechanism; source type: institution. Supports: A door-hardware installation source should explain that the latch bevel must face the strike or closing direction so the latch can be pushed inward as the door shuts.. Scope note: The source would support the installation principle, while exact adjustment procedures depend on the lock model and door handing. ↩"Important Tips for Specifying Fire Door Assemblies", https://steeldoor.org/tips-for-specifying-fire-door-assemblies/. Fire-door guidance treats the door leaf, frame, hinges, latching hardware, seals, and installation as parts of a tested assembly whose combined condition affects fire-resistance performance. Evidence role: expert_consensus; source type: government. Supports: An authoritative fire-door or building-code source should support that fire-door performance depends on the tested assembly, including door leaf, frame, hardware, seals, and installation.. Scope note: The source would support the assembly-level principle; specific compliance depends on the applicable jurisdiction, listing, and tested configuration. ↩
"Electric Strike Troubleshooting 10 Steps", https://www.hesinnovations.com/en/about/news-articles/electric-strike-troubleshooting-10-steps. Door-hardware troubleshooting guidance commonly recommends operating the latch or lock with the door open before testing it closed, because failure only when closed often indicates strike, gap, hinge, or frame alignment issues rather than an internal lock fault. Evidence role: general_support; source type: institution. Supports: A maintenance or door-hardware source should support testing lock operation with the door open before testing closed to isolate mechanism function from strike or frame alignment.. Scope note: This supports the diagnostic method generally and does not rule out combined lock and alignment faults in a specific installation. ↩