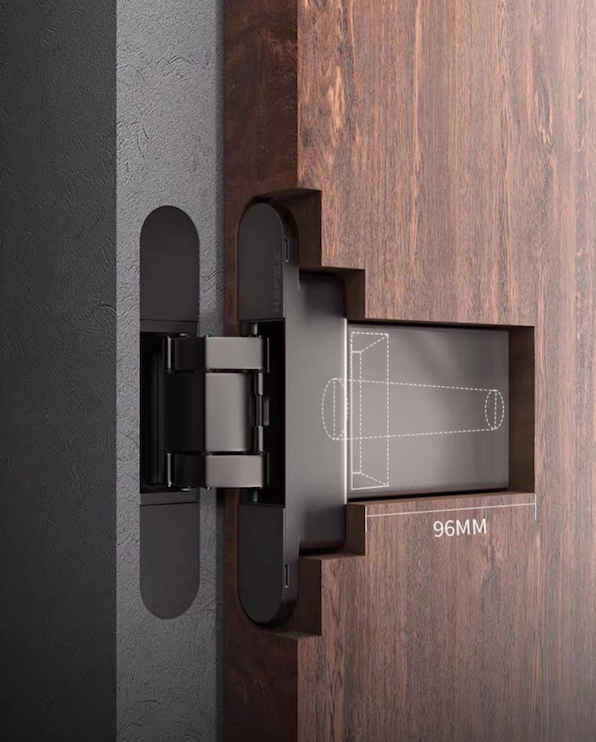
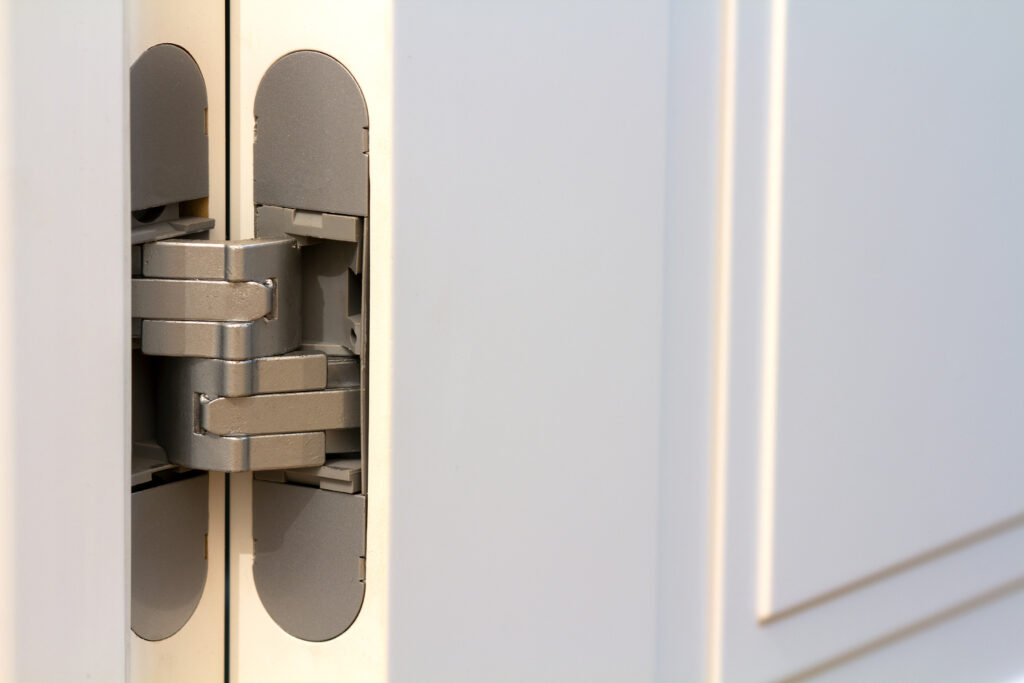
In modern minimalist and French vintage-style home interiors, invisible doors are undoubtedly an excellent design element for enhancing a space’s overall sense of cohesion and sophistication. However, while blindly pursuing the seamless, unified aesthetic of “vast white walls,” many people often overlook the unsung hero—the critical, high-performance component working behind the scenes: concealed hinges.
The usability and longevity of an invisible door depend entirely on its hinges. In today’s article—drawing upon standard hardware installation and adjustment protocols—we will guide you through the entire process: from selection, functionality, and installation to final fine-tuning. Our goal is to demystify the secrets behind concealed hydraulic hinges, ensuring your invisible door remains perfectly aligned—free of sagging or gaps—for another ten years!
🛑 Understanding Classification and Weight-Based Selection
Before purchasing concealed hinges, you must select the appropriate specifications based on the actual weight of the door leaf. The most common load-bearing specifications available on the market fall into three categories: 40 kg, 60 kg, and 80 kg.
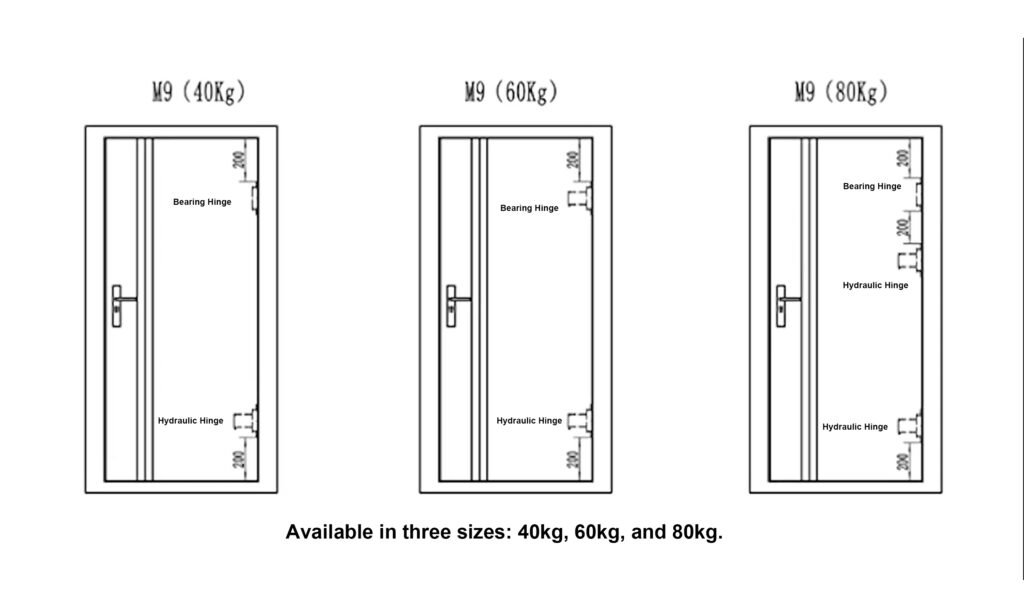
Furthermore, in terms of functional structure, hinges are primarily divided into two categories:
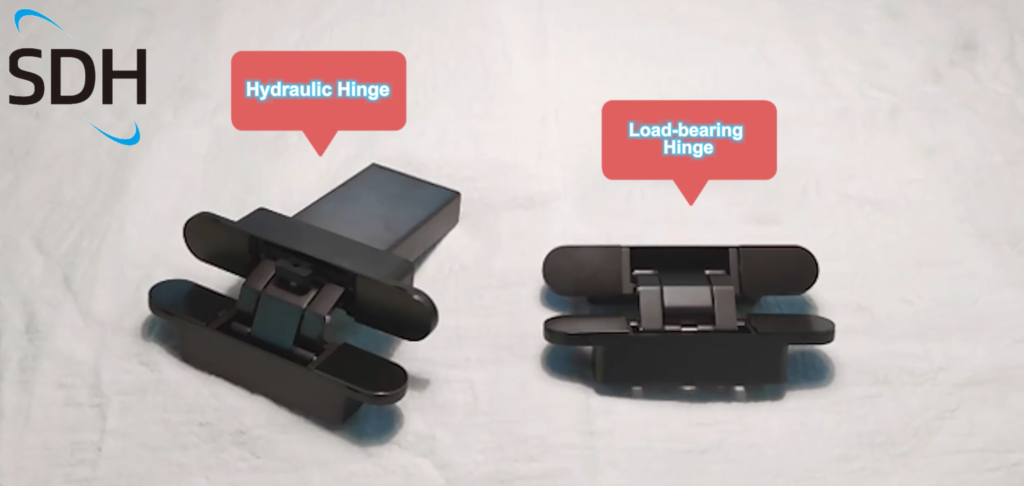
💡Hydraulic Concealed Hinge
It features a built-in hydraulic buffer adjustment valve that enables automatic door closing and allows for the free adjustment of the closing speed.
💡Load-bearing Hinge
Standard concealed hinges serve purely to provide stability and bear weight, offering no resistance during opening and closing.
Demonstrating the 3D adjustment hinge function:
The hinge can be adjusted vertically.
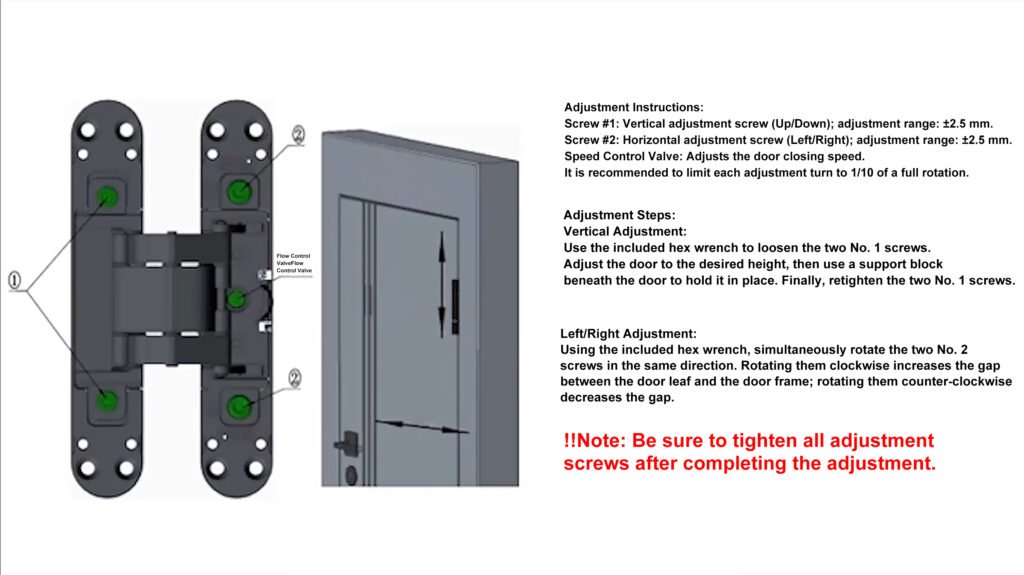
With traditional standard hinges, a misaligned installation essentially spells failure. High-end concealed hinges, however, feature an extremely precise internal mechanical transmission mechanism that supports free three-dimensional (3D) adjustment, offering an adjustment range of up to ±2.5 mm.
📋 Concealed Hinges Standardized Installation
The grooving for invisible doors requires extreme precision. Typically, the grooves in both the door leaf and the door frame must be cut using specialized machinery at the factory prior to shipment. During on-site installation, please adhere to the following standard procedures:
- Inspection and Disassembly: Inspect the included accessories and remove the minimalist, all-metal decorative covers from the hinges.
- Direction Verification: Insert the hinges into their respective slots one by one and secure them with screws. Before fastening, be sure to repeatedly verify the intended door opening direction to avoid the need for rework.
- Door Alignment: Position the door leaf vertically upright, maintaining a 90-degree opening angle; then, gently align the hinges and insert them into the corresponding mortise slots on the door frame. At this stage, shims may be placed beneath the door to stabilize and support the door leaf; subsequently, proceed to fasten the remaining screw holes one by one.
⚠️ CRITICAL WARNING: Newly purchased hydraulic hinges come equipped with a pre-installed retaining clip. Under no circumstances should you remove this clip before the hinge has been fully and securely installed! Furthermore, you must not attempt to close the door before the retaining clip has been removed. Failure to observe this warning—specifically, attempting to force the door shut prematurely—will result in immediate and permanent structural damage to both the hydraulic hinge and the door itself.
⚙️ Concealed Hinges Ultimate Fine-Tuning: Adjusting the Door Gap and Closing Speed to Be “Silky Smooth”
Once all screws have been secured and the retaining clips successfully withdrawn, the process enters the final overall adjustment phase.
- Door Gap Fine-Tuning
Close the door and observe the surrounding gaps to check for consistency. If you notice that the gap on any particular side is too wide or too narrow, retrieve the No. 4 hex key again and apply slight rotational adjustments—following the “3D Adjustment Logic” described in Part 2—until the lines on all sides are perfectly aligned. - Closing Speed Adjustment
Repeatedly push the door open and release it to test its automatic closing speed. If you find that the door closes too quickly—risking impact with the wall—or too slowly—failing to close securely:
- Take a flathead screwdriver and adjust the adjustment valve on the hydraulic hinge.
- Rotate clockwise: Closing speed decreases.
- Rotate counter-clockwise: Closing speed increases.
- Tip: For each adjustment, simply turn the valve one-fifth of a full turn (approximately 72 degrees) to fine-tune the setting. The most comfortable and safest door-closing time typically falls between 3 and 5 seconds.
Finally, with the minimalist,—and virtually invisible—decorative cover perfectly snapped into place over the hardware to conceal every screw hole, a seamless invisible door exuding an air of sheer luxury is officially complete!
✨ Conclusion
The true mark of sophistication in an invisible door lies not in how stunning it looks when opened, but rather in how completely it vanishes from sight when closed. Ultimately, this depends entirely on whether you have selected the right concealed hydraulic hinges—specifically those featuring 3D adjustability—and whether you have taken the time to perform patient, precise fine-tuning. Be sure to forward this to any friends who are currently renovating or planning to install an invisible door! If you encounter any installation issues, please do not hesitate to contact us!