
How to remove a door hinge pin with non-removable pins?
I see many people hit harder when a hinge pin will not move. That can turn a security hinge into a damaged door problem.
I remove a non-removable hinge pin only after I identify the retention method. A set-screw pin may come out after the screw is removed. A riveted or peened pin usually needs one formed end ground off before extraction.

I treat a non-removable hinge pin as a security design first, not as a stuck pin. I have seen buyers, installers, and maintenance teams lose time because they assume every hinge pin should tap out from the bottom. That idea is risky. Some pins are locked by a hidden screw. Some pins are fixed by a formed metal head. The right method depends on the hinge structure. If I understand the structure first, I can protect the door, the frame, the finish, and the security function.
What makes a door hinge pin non-removable?
I see confusion when a hinge looks normal from the outside. The pin will not move, so people think rust or paint is the cause.
I define a non-removable hinge pin as a pin that is locked inside the hinge barrel by design.1 I usually see two types: a set-screw retained pin and a riveted or peened pin.2

Why does this design exist?
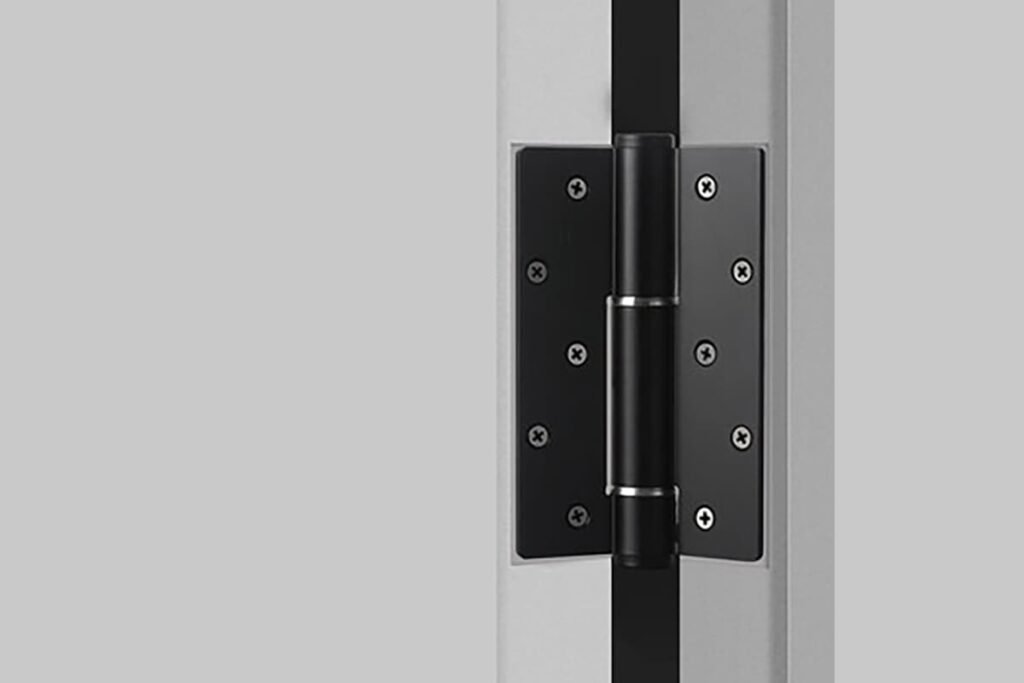
I first look at the door position and hinge exposure. A non-removable pin is common on exterior doors when the hinge knuckles are visible from the outside.3 If a normal removable pin is exposed, someone may try to knock it out when the door is closed.4 A security hinge blocks that risk. The hinge still rotates like a normal hinge, but the pin is enclosed, locked, or formed so it cannot be pushed out with a simple punch.
I do not call this a defect. I call it a retention design. That small difference changes the whole repair plan. A stuck pin may need oil, careful tapping, and cleaning. A non-removable pin needs identification before action.
| Item I check | What I may find | What it means |
|---|---|---|
| Hinge barrel ends | Flat, capped, or mushroomed metal | The pin may be mechanically fixed |
| Inside hinge face | Small screw hole | The pin may be held by a set screw |
| Door use | Exterior or public access door | Security design is more likely |
| Pin movement | No movement after light tapping | I stop and identify the retention method |
I also check the hinge finish. A stainless steel hinge, brass hinge, or plated hinge can be scratched fast. If I force the pin, I may leave marks that cannot be hidden after installation.
How do I identify a set-screw retained hinge pin?
I never start with a hammer when I suspect a set screw. I open the door and look for the locking point first.
I identify a set-screw retained hinge pin by finding a small screw that locks into a groove on the pin. The screw is often accessible only when the door is open.5

Where do I look for the screw?
I open the door wide enough to see the inside side of the hinge leaf and barrel area. I look along the hinge knuckles, the inner leaf edge, and the side that is blocked when the door is closed. Many security hinges hide the screw from outside access. This is the point of the design. The screw may be small. It may use a slotted, Phillips, hex, or Torx drive. It may also be painted over or covered by dirt.
I use a light and a small pick to clean the screw recess. I do not strip the screw head. A stripped retaining screw can make a simple job much harder. I also support the door before I remove any hinge pin, since the door weight may shift.6
| Sign I notice | My likely conclusion | My next action |
|---|---|---|
| Small screw on inside hinge area | Set-screw retained pin | I select the correct driver |
| Screw is hidden when closed | Security function is intended | I keep the door open for access |
| Screw head is painted | Installation finish covered it | I clean the slot with care |
| No screw is visible | It may be peened or another design | I inspect the pin ends |
I do not assume all security hinges use the same screw position. As a hardware manufacturer, I know designs vary by hinge series, door standard, and market requirement.
How do I remove a set-screw retained non-removable hinge pin?
I see damage when people tap the pin before they remove the retaining screw. The screw can score the pin and deform the barrel.7
I remove a set-screw retained hinge pin by opening the door, locating the screw, removing it fully, supporting the door, and then tapping the pin only if the hinge design allows removal.

What steps do I follow?
I start by protecting the door surface and frame with tape or a cloth. I place support under the door if I plan to remove more than one pin. I then open the door to access the retaining screw. I clean the screw recess and use the correct screwdriver or bit. I apply steady pressure. I do not use an undersized bit because it may round the head.
After the screw is removed, I check whether the pin is designed to slide out. Some set-screw hinges allow service removal. Some do not. If the pin can move, I use a small punch or pin tool from the correct end and tap lightly. I keep the force straight, not angled. I stop if the hinge barrel starts to spread or if the pin does not move.
| Step | What I do | Why I do it |
|---|---|---|
| 1 | I support the door | I reduce load on the hinge |
| 2 | I open the door | I access the hidden screw |
| 3 | I remove the retaining screw | I release the pin groove |
| 4 | I tap the pin gently | I test safe movement |
| 5 | I stop if resistance stays high | I prevent barrel damage |
I also keep the small screw safe. If I reinstall the hinge without it, I lose the security function that the hinge was made to provide.8
How do I remove a riveted or peened non-removable hinge pin?
I treat a peened pin as a permanent mechanical lock. More hammer force usually makes the hinge worse, not better.
I remove a riveted or peened hinge pin only by removing one formed end first. I usually grind the mushroomed end carefully, then drive the pin out after the mechanical stop is gone.

What is a peened pin?
A peened pin is formed after the pin is inserted into the hinge barrel. The end of the pin is flared, mushroomed, or riveted so it cannot pass through the barrel hole.9 This is different from a set screw. There may be no screw to remove. The metal shape itself blocks removal.
I inspect both ends of the hinge pin. I look for a head that is wider than the barrel opening. I also look for a flattened or rounded end that looks formed, not separate. If I see this, I do not try to drive the pin through the hinge. The enlarged end will jam against the hinge knuckle.
| Feature I see | Set-screw pin | Peened pin |
|---|---|---|
| Hidden retaining screw | Common | Usually no |
| Mushroomed pin end | Usually no | Common |
| Pin comes out after screw removal | Possible | Not before grinding |
| Normal tapping works | Sometimes | Usually no |
| Security method | Screw locks groove | Formed metal blocks exit |
If removal is necessary, I use a small grinder or rotary tool to remove one formed end. I wear safety glasses. I protect the door, frame, glass, and nearby finish from sparks and metal dust. I control heat because too much heat can discolor plated or stainless surfaces10. I work slowly. If the hinge is on a finished door, I often prefer removing the full hinge from the door and working on a bench. If the hinge is low-cost or damaged, replacement may be more sensible than pin extraction.
What mistakes should I avoid when the hinge pin will not move?
I have seen a simple hinge service turn into a costly door repair because someone used force before structure.
I avoid hard hammering, angled punches, oversized tools, and blind grinding. These actions can bend the hinge barrel, scratch the finish, loosen screw holes, and reduce the door’s security.

Why is force-first repair risky?
A hinge barrel is made to rotate around a pin with close fit. If I hit the pin at an angle, I can oval the knuckle hole.11 If I hit too hard, I can spread the barrel or misalign the hinge leaves. A door may then sag, bind, or fail to close smoothly. If the hinge is installed on a fire-rated or exterior door, this can create a larger compliance and safety problem.12
I also pay attention to surface finish. Door hardware buyers often care about consistent finish in bulk orders. A grinder mark, hammer dent, or deep scratch can make a hinge unacceptable even if it still functions. The same issue matters for wholesalers and door factories. A single damaged hinge may delay final assembly or trigger customer complaints.
| Mistake I avoid | Possible result | Better action |
|---|---|---|
| Hammering harder | Bent barrel or stuck pin | Identify the retention method |
| Using a screwdriver as a punch | Slipped tool and scratches | Use a proper punch |
| Ignoring door weight | Door drops or twists | Support the door first |
| Grinding without protection | Metal dust and finish burns | Cover nearby surfaces |
| Removing security parts permanently | Lower security level | Reinstall or replace correctly |
I also do not remove a security feature just because it is inconvenient. If the door needs security hinges, the final repair should keep that security level.
When should I remove the full hinge instead of only the pin?
I choose full hinge removal when the pin design is permanent, the finish must be protected, or the door is already unstable.
I remove the full hinge when pin extraction may damage the door or hinge. I also replace the hinge when the pin is peened, worn, corroded, or not meant for field service.

How do I decide between pin removal and hinge removal?
I compare the risk, time, and final door performance. If a set screw is accessible and the pin moves after release, pin removal is practical. If the pin is peened, grinding on the installed door may create more risk than benefit. In that case, I may remove the hinge screws and take the hinge off. I can then inspect it on a bench, protect the finish better, and replace it if needed.
Door condition also matters. If the screw holes are loose, the hinge leaves are bent, or the door has sagged, pin removal will not fix the real issue. A new hinge or a full hardware adjustment may be needed. I also check whether the door is fire-rated. If it is, I avoid random modification. I confirm the hinge type and rating before changing parts.
| Situation I face | My preferred decision | Reason |
|---|---|---|
| Set screw is visible and clean | Remove screw and test pin | Low damage risk |
| Pin end is peened | Remove hinge or grind with care | Pin is mechanically blocked |
| Hinge finish must stay perfect | Remove full hinge | Better surface control |
| Door is heavy | Support door and remove hinge carefully | Safety risk is higher |
| Fire-rated opening | Confirm rated hardware | Compliance matters |
I see this decision often in factory and project work. The fastest action is not always the safest action. A controlled method protects the door system.
How should buyers and door factories specify hinge pin types?
I see many procurement problems start before installation. The purchase order says “butt hinge,” but the pin structure is not defined.
I specify the hinge pin type before bulk purchasing. I confirm removable pin, set-screw security pin, or riveted non-removable pin, so installation, maintenance, and security expectations match the project.

What should I confirm before ordering?
I ask for the door application first. Interior doors may use normal removable pins. Exterior doors with exposed hinges may need security pins. Project doors, hotel doors, public buildings, and fire-rated doors may have clear hardware requirements. I then confirm the hinge material, size, bearing type, finish, screw pattern, and certification. Pin design should be part of this same checklist.
As a door hardware manufacturer, I see how small details affect bulk orders. If a buyer expects easy pin removal but receives peened hinges, maintenance teams may complain later. If a project needs security hinges but receives removable pins, the door may not meet the intended security level. This is why I prefer clear drawings, sample approval, and written specifications.
| Specification item | Option I confirm | Why it matters |
|---|---|---|
| Pin type | Removable, set-screw, peened | It affects service and security |
| Door position | Interior or exterior | It affects security needs |
| Hinge finish | SS, satin, polished, plated | It affects visual matching |
| Certification | CE or fire-rated where needed | It affects market access |
| Packaging | Bulk or set packing | It affects assembly speed |
| Screw and accessory set | Standard or customized | It affects installation |
I also confirm whether the hinge must match local standards. Europe, the Middle East, and Southeast Asia may have different door thickness, frame style, and project habits. A clear hinge pin specification helps me avoid wrong assumptions and after-sales issues.
Conclusion
I remove non-removable hinge pins only after I identify the design. Set screws, peened ends, safety, and project specifications all change the right method.
"The Non-Removable Pin Hinge", https://www.directdoorhardware.com/what-is-a-non-removable-pin-hinge.htm?srsltid=AfmBOooyRt0WrUVO7UMjz8PHxgYuJ3YaT2eKxXNB_GLjYRvteTffx2ae. A door-hardware standard or technical glossary defines a non-removable-pin hinge as a hinge in which the pin is retained against removal, supporting the article's use of the term as a design feature rather than a symptom of corrosion or paint. Evidence role: definition; source type: institution. Supports: A source should define non-removable-pin hinges as hinges whose pins are retained by design for security or tamper resistance.. Scope note: The source may define the category generally and may not describe every manufacturer-specific retention method. ↩
"SECTION 08 71 00 DOOR HARDWARE", https://www.nashcountync.gov/DocumentCenter/View/13355. Technical door-hardware references describe non-removable hinge pins as being retained by mechanisms such as set screws or formed pin ends, which supports the article's distinction between screw-retained and peened designs. Evidence role: definition; source type: institution. Supports: A neutral hardware reference should identify set-screw retention and peened or riveted pin ends as accepted non-removable hinge-pin constructions.. Scope note: The source would support the general classification, not the frequency with which the author personally encounters each type. ↩
"Security Hinges - NRP and Sec Tab", https://www.hingeoutlet.com/collections/security-hinges-nrp-and-sec-tab/stainless-steel-hinges?srsltid=AfmBOoqBwZjPp4GVErghDJB76jnGpPAA62fiNuf0W6fRdnUdvninNUOZ. Crime-prevention guidance commonly treats exposed exterior-door hinges as a security concern and recommends non-removable pins or security hinges when hinge barrels are accessible from outside. Evidence role: expert_consensus; source type: government. Supports: A crime-prevention or building-security source should state that exterior doors with exposed hinges should use non-removable pins or equivalent security hinges.. Scope note: Such guidance supports the security rationale and common recommendation, but it may not quantify how common these hinges are in all markets. ↩
"Home Burglary Prevention | DuPont, WA - Official Website", https://www.dupontwa.gov/598/Home-Burglary-Prevention. Public crime-prevention materials identify exposed removable hinge pins as a door-security weakness because the pins may be driven out from the exterior side. Evidence role: mechanism; source type: government. Supports: A source should explain that exposed removable hinge pins can allow tampering with an outswing or externally hinged door.. Scope note: This supports the plausibility of the attack method, not the likelihood of its use in any specific burglary. ↩
"Is this a non-removable hinge pin?", https://www.houzz.com/discussions/6204511/is-this-a-non-removable-hinge-pin. Door-hardware references for non-removable-pin hinges describe retaining screws located on the protected side of the hinge, supporting the article's point that the screw is typically accessible only with the door open. Evidence role: mechanism; source type: institution. Supports: A technical hinge reference should show that set screws for non-removable pins are positioned on the protected side or otherwise concealed when the door is closed.. Scope note: The source would describe a common design pattern; individual hinge series may place access points differently. ↩
"Hinge Outlet Door Hinge Pin Remover Tool – Easily ...", https://www.amazon.com/Door-Hinge-Pin-Remover-Removes/dp/B00DND4NN6. Door-installation and maintenance guidance advises supporting the door when hinges or hinge pins are removed, because the remaining hardware may no longer carry the door weight safely. Evidence role: general_support; source type: education. Supports: A maintenance or installation source should state that doors should be supported when hinge pins or hinges are removed to prevent shifting, sagging, or falling.. Scope note: The source would support the general safety practice rather than the exact load behavior of every door and hinge configuration. ↩
"A Simple Technique for Removal of Interlocking Screw from ...", https://pmc.ncbi.nlm.nih.gov/articles/PMC8046469/. Mechanical-design references explain that set screws restrain shafts or pins by bearing against them, which supports the article's warning that forcing a retained hinge pin before loosening the screw can cause scoring or deformation. Evidence role: mechanism; source type: education. Supports: A mechanical-design or machine-elements source should explain that set screws create a mechanical interference with a shaft or pin, so forcing movement before release can score or deform parts.. Scope note: The support is based on the general mechanics of set-screw retention, not on a laboratory test of the specific hinge shown in the article. ↩
"Hager 4" x 4" Non-Removable Pin Hinges", https://doorlocksdirect.com/door-accessories/door-hinges/hager-4-x-4-non-removable-pin-hinges/?srsltid=AfmBOoq8HVD0OLD8SdoWxQ-yskgUs75h6LYlEkkFqZ00r3bSELvY0CAY. Technical descriptions of set-screw non-removable-pin hinges identify the retaining screw as the part that locks the hinge pin in place, supporting the article's statement that omitting it removes the intended security function. Evidence role: mechanism; source type: institution. Supports: A source should describe the retaining screw as the component that engages the pin or groove to prevent pin removal.. Scope note: The source would apply directly to set-screw retained hinges and not to peened, welded, or otherwise retained pin designs. ↩
"Rivet", https://en.wikipedia.org/wiki/Rivet. References on riveting and peening describe the process as deforming metal to create an enlarged head, supporting the article's explanation that a mushroomed hinge-pin end prevents passage through the barrel opening. Evidence role: mechanism; source type: encyclopedia. Supports: A source should explain that peening or riveting plastically deforms metal to form an enlarged head that mechanically retains a part.. Scope note: The source would support the metalworking principle, not necessarily a specific hinge manufacturer's construction. ↩
"Stainless Steel Discoloration After Fabrication | Causes & ...", https://www.actionstainless.com/troubleshooting-stainless-steel-after-fabrication-heat-tint-discoloration-and-surface-defects-explained. Materials references describe heat tint on stainless steel and heat-related damage to surface finishes, supporting the article's caution that grinding heat may discolor finished hinge surfaces. Evidence role: mechanism; source type: research. Supports: A metallurgy or surface-finishing source should explain that heating stainless steel can create heat tint and that plating or coatings may discolor or degrade under excessive heat.. Scope note: The source would establish the material mechanism; the temperature and discoloration threshold vary by alloy, coating, and finish. ↩
"Analysis of the Possibility of Increasing the Load-Bearing ...", https://pmc.ncbi.nlm.nih.gov/articles/PMC12387653/. Mechanical-engineering sources on pin joints describe bearing stresses and hole deformation under off-axis or excessive loads, supporting the article's warning that angled hammering can oval a hinge knuckle hole. Evidence role: mechanism; source type: education. Supports: A mechanical-engineering source should explain that off-axis loads on pin joints can produce bearing deformation or ovalization of holes.. Scope note: The support is a general engineering mechanism and may not provide hinge-specific damage thresholds. ↩
"CAUTIONARY TALES OF ROGUE FIELD MODIFICATIONS", https://www.fcia.org/Portals/0/DOIT%20Dont%20Touch%20that%20Fire%20Door-compressed.pdf. Fire-door standards treat hinges and related hardware as part of the rated door assembly, supporting the article's warning that hinge damage or unapproved modification can affect compliance and safety. Evidence role: expert_consensus; source type: institution. Supports: A fire-door standard or inspection guide should state that fire-door assemblies and their hardware must remain compliant with listed or rated requirements and should not be arbitrarily modified.. Scope note: The source would establish the regulatory principle; whether a particular repair voids a rating depends on the listed assembly and local authority having jurisdiction. ↩
