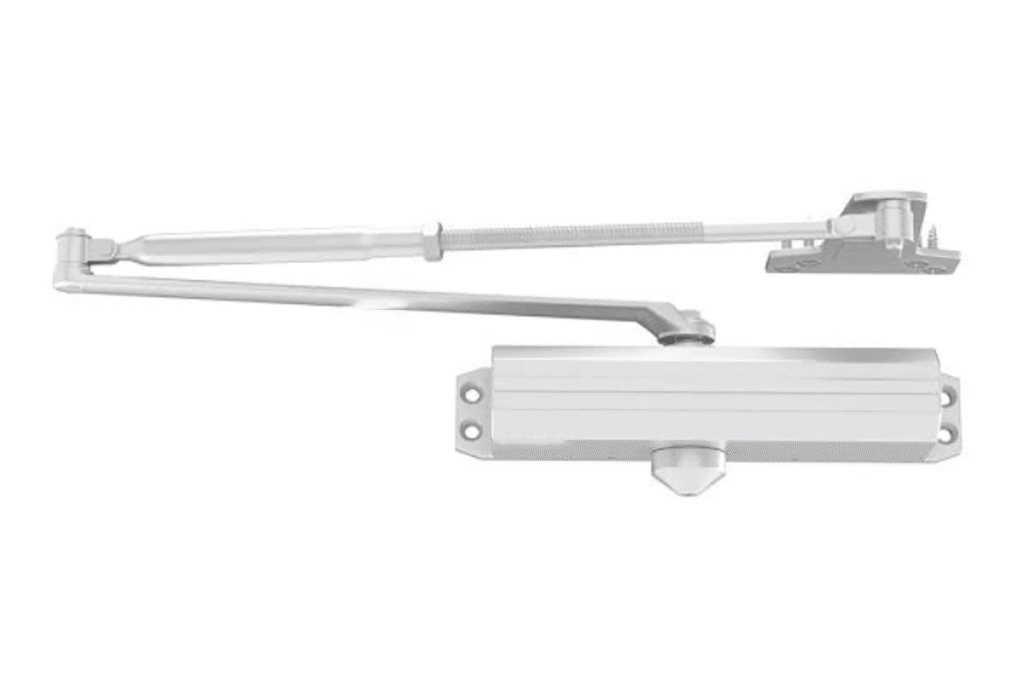
How to Install a Commercial Door Closer?
A commercial door closer looks simple until the door slams, fails to latch, or rubs after installation. That small mistake can create safety concerns, project complaints, and costly after-sales disputes. I treat installation as a selection and verification process first, then a controlled mounting and adjustment process.
To install a commercial door closer correctly, first confirm the door weight, width, material, opening direction, traffic level, frame condition, and project requirements. Then choose the correct mounting method, follow the manufacturer’s drilling template, fix the body and arm securely, check clearance, and adjust closing and latching speed after testing.
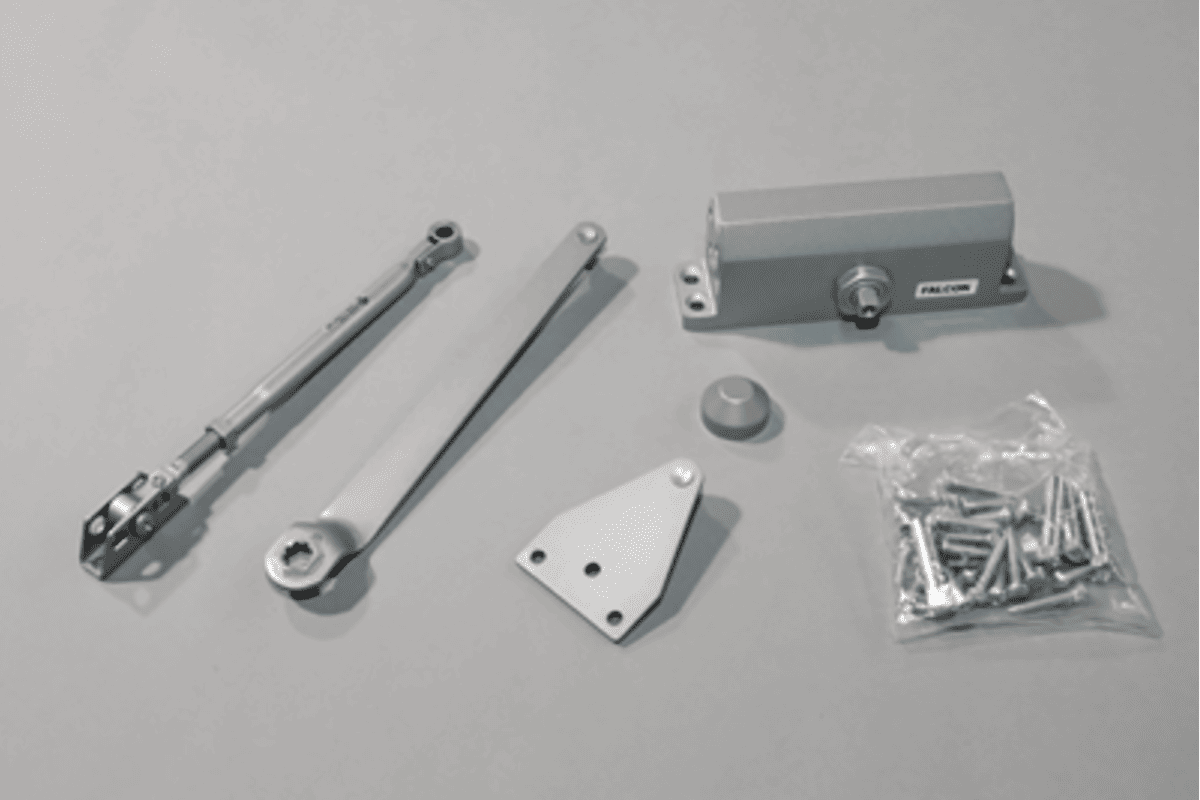
Many buyers ask me for a universal installation method. I usually explain that no single drilling tutorial fits every door. The closer body, arm geometry, door frame, fire-rating requirements, and opening conditions all affect the result. Let’s walk through the decision logic before the screwdriver comes out.
What Should You Check Before You Install a Commercial Door Closer?
Choosing a commercial door closer without checking the door conditions can create problems before installation even begins. The door may be too heavy, the frame may have limited fixing space, or wind pressure may overpower the closer. A good pre-check prevents weak closing, slamming, and repeated complaints.
A buyer should check door width, door weight, door material, swing direction, traffic frequency, wind pressure, frame structure, mounting space, and fire-rated project requirements before installing a commercial door closer. These factors decide closer power size, mounting method, arm type, adjustment range, and whether professional installation review is needed.
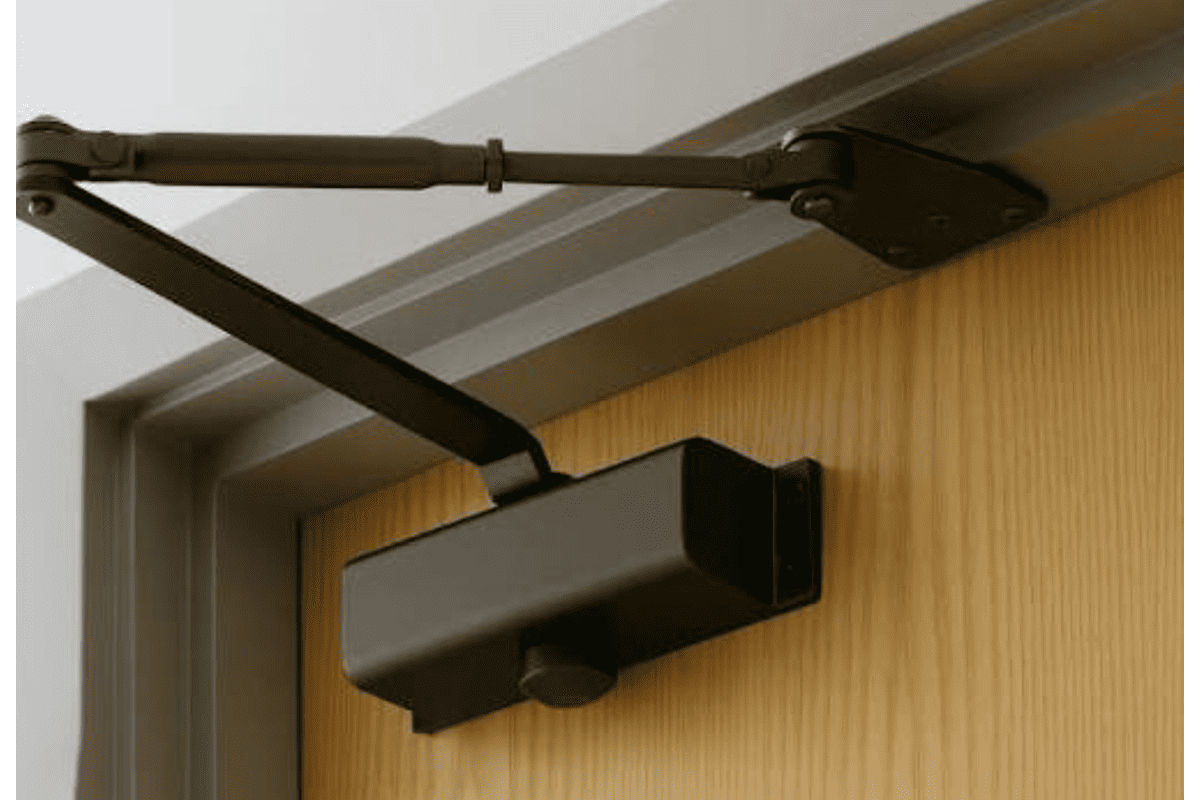
Start With the Door, Not the Closer
In customer consultations, I often see buyers start with the closer model number. I prefer to start with the door. The closer only performs well when it matches the actual door and site conditions.
Before installation, I suggest checking these points:
- Door width: Wider doors need more closing force.1
- Door weight: Heavier doors require stronger closer power and better fixing strength.
- Door material: Steel, timber, aluminum, and fire-rated doors behave differently.
- Opening direction: Left-hand and right-hand doors may affect arm position.
- Traffic frequency: High-traffic entrances need stronger durability.
- Wind pressure: Exterior doors may need higher closing force or special hardware support.
- Frame structure: Thin frames, hollow sections, or weak reinforcement can affect screw holding.2
- Available mounting space: Decorative trims, glass panels, or narrow rails may limit installation.
- Project requirements: Fire doors, public buildings, and accessible routes may have specific acceptance rules.
A commercial door closer is not only a hardware product. It is part of a door system.
Buyer Evaluation Table
| Check Item | Why It Matters | Procurement Risk If Ignored |
|---|---|---|
| Door width and weight | Determines closer power size | Door may not latch or may close too hard |
| Traffic frequency | Affects durability requirement | Short service life and frequent complaints |
| Frame strength | Affects fixing stability | Loose screws or body movement |
| Wind pressure | Affects closing reliability | Door may stay open or slam |
| Fire-rated status | May restrict product type and function | Project acceptance failure |
| Mounting space | Decides installation method | Arm rubbing or wrong template use |
Fire-Rated and Compliance Considerations
If the door is part of a fire-rated assembly, I recommend that buyers verify all project-specific requirements before purchase and installation. Standards such as UL 10C, NFPA 80, ANSI/BHMA A156.4, ADA, ICC/ANSI A117.1, or local fire codes can be relevant in some markets.3 However, requirements vary by country, project type, and acceptance authority.
For procurement teams, the practical approach is:
- Request valid certificates and test reports where needed.
- Check whether the closer model is approved for the intended door type.
- Confirm whether hold-open functions are allowed.
- Ask the contractor or qualified professional to verify site compliance.
A common misunderstanding is that any closer with a certificate can be used on any fire door. That is not always true.4 The complete door assembly, installation position, function, and local inspection requirement matter.
Why This Step Reduces After-Sales Disputes
Many after-sales complaints sound like product failure at first:
- “The closer has no power.”
- “The door closes too fast.”
- “The door cannot latch.”
- “The closer arm hits the frame.”
- “The door feels too heavy to open.”
Sometimes the product is defective. Sometimes the closer size is wrong. Sometimes the template was not followed. Sometimes the door itself has resistance from hinges, seals, floor contact, or frame deformation.
That is why I always suggest recording the door data before confirming the order. For B2B buyers, this simple step helps protect the supplier, installer, and end user from avoidable arguments.
Which Commercial Door Closer Mounting Method Fits the Door?
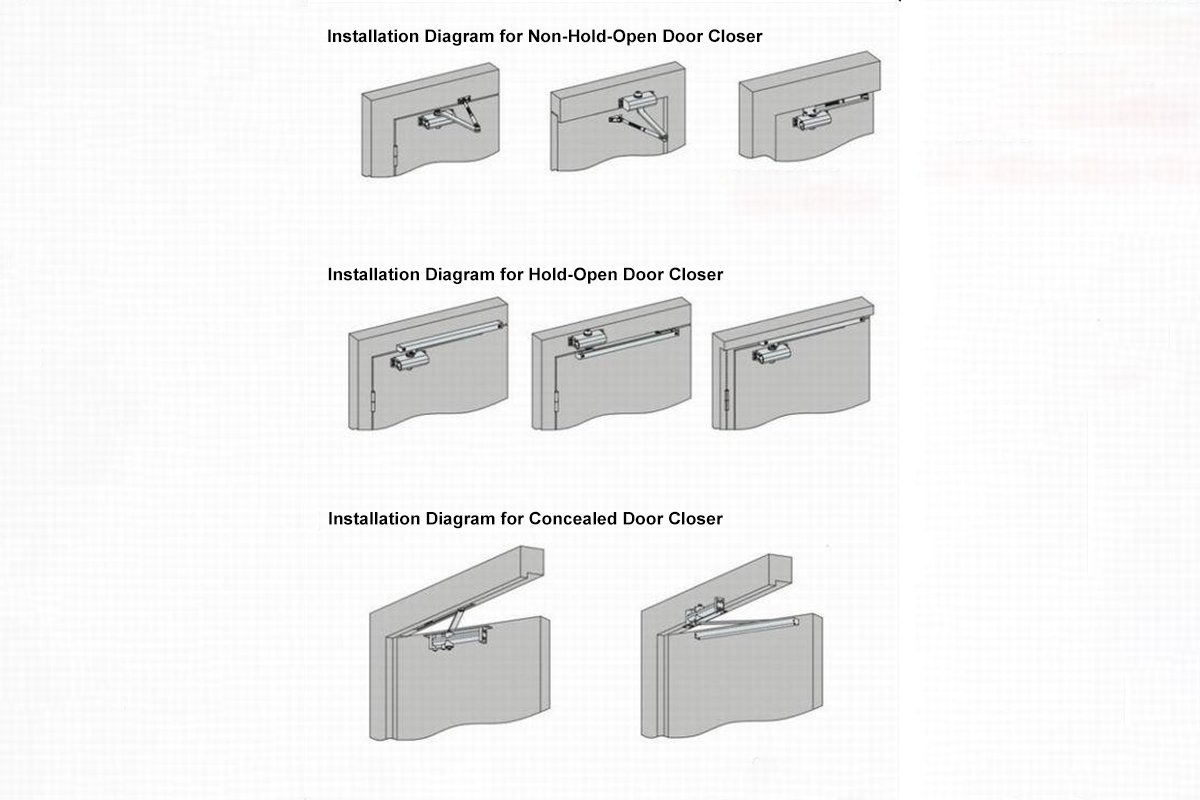
A commercial door closer can be installed in several ways, but the wrong mounting method changes the arm force angle and closing performance. If the selected method does not match the door structure, the closer may rub, lose power, or fail to meet project appearance requirements.
The correct mounting method depends on door swing, frame position, available fixing space, appearance requirements, and closer type. Common methods include regular arm, parallel arm, top jamb, slide track, concealed, and heavy-duty installation. Buyers should match the method to the manufacturer template and project conditions.
Common Mounting Methods
Most commercial projects use one of the following installation styles:
| Mounting Method | Typical Use | Main Advantage | Main Risk |
|---|---|---|---|
| Regular arm / standard arm | Pull side of door | Strong mechanical efficiency | Arm is more visible |
| Parallel arm | Push side of door | Better appearance and less arm projection | Usually lower closing efficiency5 |
| Top jamb / top frame | Push side with narrow top rail | Useful when door face has limited space | Needs strong frame fixing |
| Slide track | Modern commercial interiors | Cleaner appearance | May have lower closing force than arm type |
| Concealed closer | Premium or hidden hardware doors | Hidden appearance | Requires accurate door preparation |
| Heavy-duty closer | Large, high-traffic, or exterior doors | Higher durability and force | Needs stronger installation structure |
Regular Arm Installation
A regular arm setup is often used on the pull side of the door. It usually provides strong closing efficiency because the arm geometry gives good leverage. However, the arm is visible and may not suit every design.
I see this option often on:
- Utility doors
- Office back doors
- Commercial service doors
- Some fire door applications, depending on approval
Parallel Arm Installation
A parallel arm closer is often mounted on the push side. The arm sits more parallel to the door when closed, so it looks cleaner and reduces the chance of impact damage in busy corridors.
However, buyers should note one practical point: a parallel arm setup may require more closer power than a regular arm setup for the same door condition. The exact requirement depends on the manufacturer’s data.
Top Jamb Installation
Top jamb installation places the closer body on the frame instead of the door leaf. This can be useful when the door top rail is too narrow or when the door face cannot accept the closer body.
However, the frame must be strong enough. If the frame is thin, hollow, or poorly reinforced, the closer may loosen over time.
Slide Track and Concealed Options
Slide track closers are common in projects where appearance matters. They have a cleaner look than traditional arm closers. Concealed closers go further by hiding the mechanism inside the door or frame.
However, these options require more accurate preparation. For concealed models, the door factory usually needs to machine the door and frame according to exact product drawings.6 This is not a casual site drilling task.
Heavy-Duty Commercial Applications
Heavy-duty closers are selected for large doors, high-frequency use, or harsher conditions. Examples include:
- School doors
- Hospital corridor doors
- Shopping mall service entrances
- Exterior steel doors
- Public building fire doors
For these applications, buyers should evaluate more than closing force. They should also check cycle testing7, body material, arm strength, valve stability, finish durability, and after-sales part availability.
My Procurement Advice
When I discuss closer selection with wholesalers or project suppliers, I suggest that they do not sell only by price level. The mounting method should be confirmed before quotation when possible.
A practical pre-order question list is:
- Which side of the door will the closer be mounted on?
- Is the door push side or pull side installation?
- Is the top rail wide enough?
- Is the frame strong enough for top jamb mounting?
- Is a clean appearance required?
- Is the door fire-rated or subject to inspection?
- Will the installer follow the supplied template?
This approach helps reduce incorrect returns. It also helps the buyer communicate clearly with contractors and end users.
How Do You Install a Commercial Door Closer With a Standard Arm?
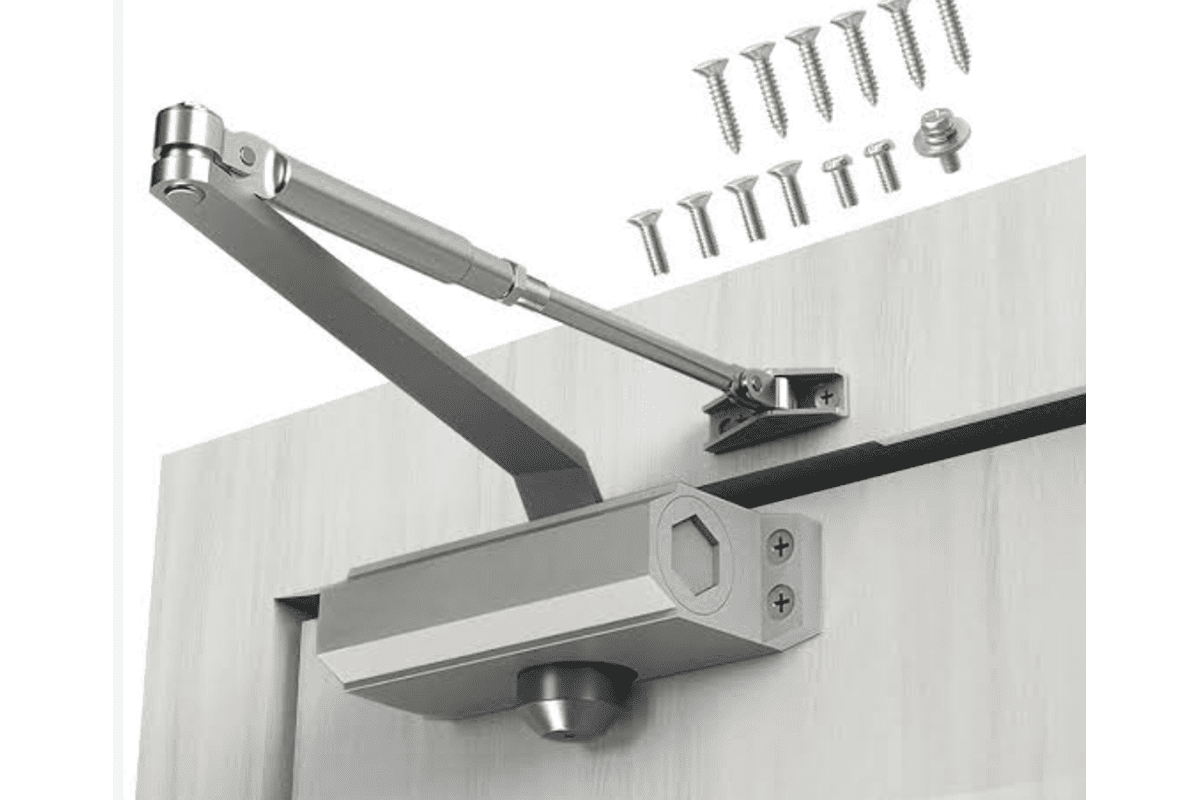
A commercial door closer with a standard arm can fail if the installer guesses the hole positions or ignores the template. The problem may not appear immediately. After several days, the door may slam, the arm may rub, or the screws may loosen under repeated use.
To install a standard-arm commercial door closer, read the manufacturer template, confirm the handing and mounting side, mark the template holes, drill suitable pilot holes, fix the closer body, install the arm shoe, connect and preload the arm as instructed, check clearance, then adjust closing and latching speed.
General Workflow Only
I want to be clear here. This is a general workflow, not a replacement for the specific closer manual. I do not recommend using random online drilling dimensions because hole positions vary by brand, model, arm type, opening angle, and mounting method.8
A safe standard-arm workflow usually looks like this:
- Read the manufacturer installation sheet.
- Confirm door handing and mounting side.
- Tape the supplied template to the correct position.
- Mark the body and arm shoe holes.
- Drill according to the door material and supplied instructions.
- Fix the closer body securely.
- Install the arm shoe or bracket.
- Connect the main arm and forearm.
- Preload the arm according to the manual.
- Open and close the door slowly to check clearance.
- Adjust closing speed and latching speed.
- Test several cycles before handover.
Tools and Site Preparation
The exact tools depend on the door and closer model, but installers commonly prepare:
- Measuring tape or ruler
- Pencil or marker
- Drill and suitable bits
- Screwdriver or driver tool
- Level
- Manufacturer template
- Correct fasteners supplied or approved by the manufacturer
- Safety glasses and basic PPE
For metal doors, installers may need tapping tools or reinforced fixing points. For timber doors, screw holding strength depends on the material quality. For aluminum doors, reinforcement may be necessary. These are reasons why professional review is important for project installations.
Important Installation Checks
| Installation Step | What to Verify | Common Problem |
|---|---|---|
| Template placement | Correct side and orientation | Door opens wrong angle or arm position is wrong |
| Hole marking | Matches manufacturer template | Body or arm cannot align |
| Fixing strength | Screws are secure | Closer loosens after use |
| Arm connection | Preload follows manual | Door lacks latching force |
| Clearance | Arm does not hit frame or wall | Rubbing, noise, or restricted opening |
| Speed adjustment | Door closes safely | Slamming or failure to latch |
Why Arm Preload Matters
In after-sales discussions, I often hear that a closer “has no power.” When we check photos or videos, so the door cannot latch properly.
Arm preload depends on the closer design. Some models require the arm to be positioned in a specific relationship to the door when connected. That is why the installation sheet matters. Guesswork may create weak closing, excessive force, or poor opening feel.
Do Not Over-Tighten Adjustment Valves
Many hydraulic closers have valves for closing speed and latching speed. Some models also have backcheck or delayed action. Installers should adjust these carefully.
A common mistake is turning a valve too far. This can damage the valve or cause oil leakage.[^9] If oil leakage appears, it usually indicates seal failure, product damage, or improper handling. The plastic cover is not designed to collect leaking oil.
Good adjustment practice includes:
- Make small changes.
- Test the door after each change.
- Never force the valve beyond the recommended range.
- Keep the door operating at a safe speed.
- Confirm that the latch engages reliably.
Standard Arm Is Not Always the Best Choice
A standard arm closer works well in many cases, but it is not universal. If the door is on the push side, a parallel arm may be better. If the top rail is too narrow, top jamb mounting may be needed. If the project requires a cleaner appearance, slide track or concealed models may be considered.
For door factories and hardware buyers, I recommend confirming the installation drawing with the customer before mass supply. This is especially important for customized doors, fire-rated doors, and export projects.
How Should You Adjust and Troubleshoot a Commercial Door Closer After Installation?
A commercial door closer is not finished when the screws are tight. Poor adjustment can make a correct product behave like a defective one. The door may slam, close too slowly, fail to latch, or feel difficult to open if the closer and door system are not checked together.
After installation, adjust the commercial door closer by testing the full closing cycle, setting the main closing speed, setting the latching speed, checking the latch engagement, and inspecting door resistance. Troubleshooting should consider product selection, installation position, valve adjustment, hinges, seals, frame alignment, and site pressure conditions.
Understand the Closing Cycle
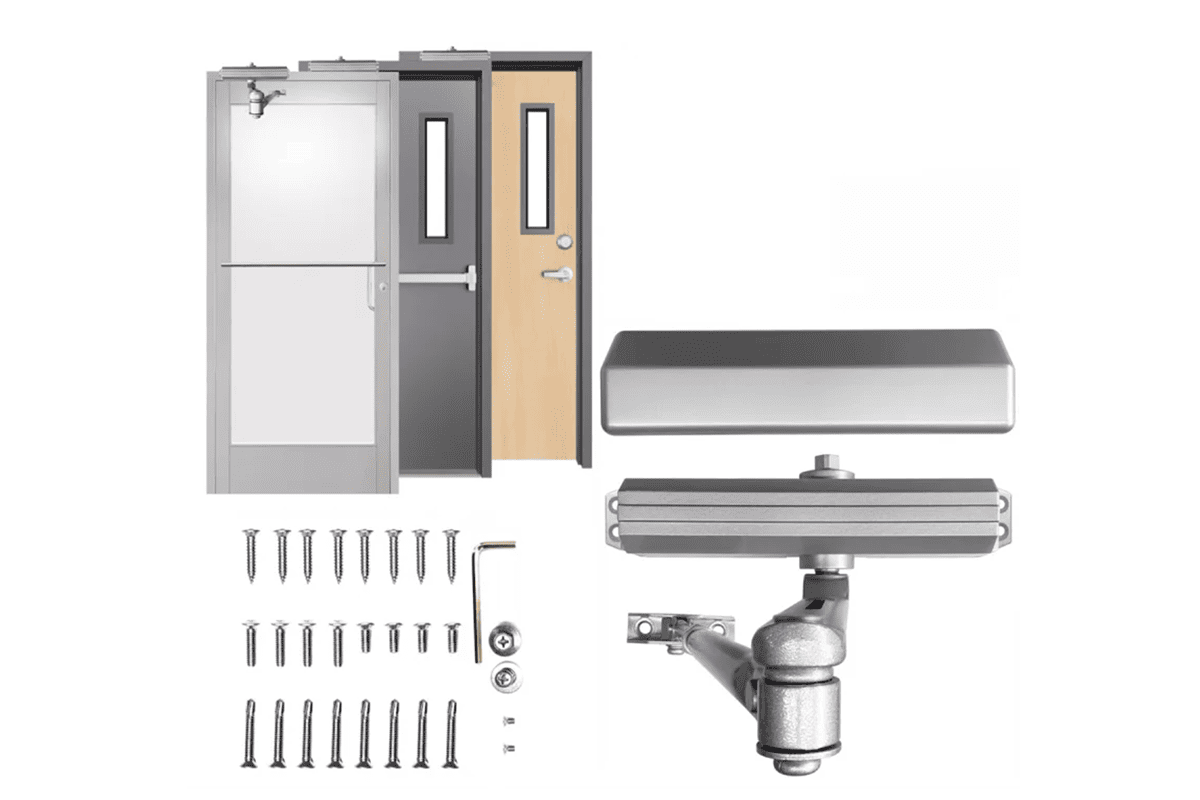
Most surface-mounted hydraulic closers control the door in phases:9
- Main closing speed: The larger part of the closing movement.
- Latching speed: The final part that helps the latch engage.
- Backcheck: Resistance when the door is opened quickly, available on some models.
- Delayed action: Slower closing for accessibility or movement needs, available on some models.
The exact functions depend on the closer model. Buyers should read the product data sheet instead of assuming every model has every adjustment.
Common Problems and Balanced Diagnosis
| Problem | Possible Product Cause | Possible Installation or Door Cause |
|---|---|---|
| Door closes too fast | Valve issue or oil leakage | Valve not adjusted correctly |
| Door closes too slowly | Incorrect valve setting | Door seals create resistance |
| Door fails to latch | Wrong closer power size | Arm preload wrong or latch misaligned |
| Door slams at final stage | Latching valve set too fast | Door frame or lock issue |
| Arm rubs frame | Wrong arm or bracket | Template position incorrect |
| Door hard to open | Closer power too strong | Hinges bind or door is misaligned |
| Oil leakage | Seal failure or damage | Valve over-adjusted or closer mishandled |
A common after-sales misunderstanding is that every closing problem proves poor product quality. Another misunderstanding is that every problem is the installer’s fault. I prefer a balanced diagnosis. The closer, door leaf, frame, hinges, lock, seals, wind pressure, and installation all work together.
Adjustment Sequence I Recommend
For general inspection, I suggest this sequence:
- Open the door fully and release it carefully.
- Observe the main closing movement.
- Adjust the main closing speed in small increments.
- Observe the last part of the closing movement.
- Adjust the latching speed carefully.
- Confirm the latch engages without slamming.
- Check whether the door rubs the floor, frame, or seals.
- Repeat several cycles.
- Record the result for project handover.
This process is simple, but it prevents many complaints. I have seen cases where one small latching adjustment solved what first looked like a serious closer defect.
Fire Doors Need Extra Care
If the door is fire-rated, the closer must reliably close and latch the door, but the project requirements must be verified locally. Hold-open functions should not be used on fire doors unless the complete system is specifically approved and allowed by local requirements.10
For fire-rated projects, buyers should ask:
- Is the closer model suitable for the fire-rated assembly?
- Is the installation method allowed?
- Are the certificates current and valid?
- Does the closer interfere with seals, latch, or coordinator hardware?
- Has the authority or qualified professional accepted the setup?
As a manufacturer, I can provide product documents for buyer verification when applicable. However, final project approval should come from the relevant professional, inspector, or authority.
When to Replace Instead of Adjust
Adjustment cannot solve every issue. Replacement or model change may be necessary when:
- The closer is undersized for the door.
- The door is exposed to strong wind pressure.
- The closer leaks oil.
- The closer body is cracked or damaged.
- The arm is bent.
- The internal spring or hydraulic control has failed.
- The door structure cannot hold the closer securely.
For wholesalers and brand operators, clear troubleshooting rules help reduce emotional disputes. They also help separate real warranty issues from site condition problems.
Frequently Asked Questions
Can I install a commercial door closer without a template?
I do not recommend it. The template controls the closer body position, arm shoe location, and operating geometry. If the holes are guessed, the door may not latch, the arm may rub, or the closer may lose force. Always follow the specific manufacturer template.
What size commercial door closer do I need?
The correct size depends on door width, weight, traffic frequency, wind pressure, and mounting method. Some closers are adjustable power models, while others have fixed power sizes. Buyers should compare project door data with the supplier’s technical sheet before ordering.
Why does the door close but not latch?
A door may fail to latch because the latching speed is too slow, the closer is undersized, the arm preload is incorrect, the lock is misaligned, or the seals create too much resistance. Check the door system before assuming the closer is defective.
Can a commercial door closer be used on a fire door?
It may be used if the closer and installation are suitable for the fire-rated door assembly and local project requirements. Buyers should verify certificates, test evidence, and approval conditions. Hold-open functions need special approval for fire-rated use.
Why is my commercial door closer leaking oil?
Oil leakage usually indicates seal failure, product damage, valve damage, or improper adjustment. It is not a normal function. The closer should be inspected, and replacement may be required if hydraulic control is affected.
Conclusion
Learning how to install a commercial door closer starts with correct selection, not drilling. Buyers should confirm door conditions, choose the right mounting method, follow the manufacturer template, and adjust the closer after testing the full door system. This approach reduces closing failure, safety risk, and after-sales disputes. If you source door hardware for projects, wholesale channels, or door production, contact SDH Hardware to discuss suitable closer options, matching hardware, and bulk procurement requirements.
"A156.4 - 2024 Door Closers and Pivots", https://buildershardware.com/ANSI-BHMA-Standards/Hardware-Highlights/A1564-2024-Door-Closers-and-Pivots. ANSI/BHMA door-closer guidance treats door size, including door width, as a relevant parameter in closer selection, supporting the statement that wider doors generally require greater closing force. Evidence role: general_support; source type: institution. Supports: Door closer sizing guidance commonly uses door width as a factor in selecting closer power or spring size.. Scope note: The source supports the general sizing principle; the exact force required still depends on door weight, mounting method, wind, seals, and manufacturer data. ↩
"Hardware Reinforcing on Steel Doors & Frames | SDI", https://steeldoor.org/ansi-250-6/. Door and frame technical guidance from industry institutions identifies reinforcement and substrate construction as factors in the secure attachment of applied hardware such as closers. Evidence role: mechanism; source type: institution. Supports: Frame reinforcement and substrate construction affect the ability of fasteners to resist loads from mounted door hardware.. Scope note: The source would provide contextual support for the fastening mechanism rather than proving failure in every thin or hollow frame. ↩
"Chapter 4: Entrances, Doors, and Gates - Access-Board.gov", https://www.access-board.gov/ada/guides/chapter-4-entrances-doors-and-gates/. NFPA 80, ANSI/BHMA A156.4, ADA accessibility provisions, and ICC/ANSI A117.1 address fire-door operation, closer performance, or accessible-door criteria, showing that commercial door closer selection may be governed by project-specific codes and standards. Evidence role: general_support; source type: institution. Supports: Referenced standards address fire-door operation, door closer performance, or accessible-door requirements that can affect closer selection and installation.. Scope note: The relevance of each standard depends on jurisdiction, occupancy type, door assembly, and the authority having jurisdiction. ↩
"Fire Doors and NFPA 80 FAQs", https://www.nfpa.org/news-blogs-and-articles/blogs/2025/04/11/fire-doors-faqs. NFPA 80 and listing practices for fire-door assemblies require hardware to be installed in accordance with the listing and the door assembly’s conditions of use, supporting the point that a certified closer is not automatically suitable for every fire door. Evidence role: expert_consensus; source type: institution. Supports: Fire-door hardware must be compatible with and installed as part of the listed or approved fire-door assembly, not merely certified in isolation.. Scope note: The source supports the compliance principle; final approval remains dependent on the specific listing, installation, and local authority. ↩
"Parallel Arm Vs. Standard Arm Door Closer Fitting", https://www.merlinarc.com/parallel-arm-vs-standard-arm-door-closer-fitting/. Institutional door-hardware training materials describe closer arm geometry as affecting leverage and closer efficiency, providing contextual support for the statement that parallel arm mounting is commonly less mechanically efficient than regular arm mounting. Evidence role: mechanism; source type: institution. Supports: Door closer mounting geometry affects leverage and mechanical efficiency, with parallel arm installations commonly requiring more power than regular arm installations.. Scope note: The degree of efficiency loss varies by closer model, arm design, opening angle, and manufacturer rating. ↩
"[PDF] Model W91DCP Overhead Concealed Closer Non-Hold Open and Hold ...", https://www.tmhardware.com/files/attachments/10027/AADSS1172493.pdf?srsltid=AfmBOooFeHFP_nN8ibzb_1dFF2uv7ufocV0duK3NnOBHPl7skgb5rmWO. Architectural hardware guidance for concealed closers describes installation as dependent on prepared door and frame cavities, fixing locations, and clearances, supporting the need to machine components according to product drawings. Evidence role: mechanism; source type: institution. Supports: Concealed closers require prepared cavities, fixing points, and clearances in the door or frame according to specified dimensions.. Scope note: The source would support the general installation requirement; exact preparation varies by closer design and manufacturer. ↩
"A156.4 - 2024 Door Closers and Pivots", https://buildershardware.com/ANSI-BHMA-Standards/Hardware-Highlights/A1564-2024-Door-Closers-and-Pivots. ANSI/BHMA A156.4 uses cycle testing as part of door closer performance classification, supporting the relevance of cycle-test data when specifying closers for high-use commercial applications. Evidence role: definition; source type: institution. Supports: Door closer standards include cycle testing as a performance measure for durability grades.. ↩
"How to Install Hydraulic Door Closer and Review",
. Door-closer installation templates specify different body and arm-shoe hole locations according to model, mounting application, and opening angle, supporting the statement that drilling positions are not universal. Evidence role: general_support; source type: institution. Supports: Door closer templates specify hole positions according to model, mounting application, and opening angle.. Scope note: This support is contextual because the exact hole variation must be verified from the specific manufacturer’s template. ↩"Spot & Fix Leaking Door Closers: Adjust, Repair, Replace - NGTECO", https://ngteco.com/blogs/workforce-insights/leaking-door-closer-repair-or-replace?srsltid=AfmBOorRB3T9Mt194kZrPKVFsSJqdKEz7e6oYHz4yuouBTGle0YeYlio. Technical guidance on hydraulic door closers explains that adjustment valves regulate internal oil flow and should not be forced beyond their operating range, supporting the claim that over-adjustment can damage valves or contribute to leakage. Evidence role: mechanism; source type: institution. Supports: Hydraulic closer valves regulate oil flow and can be damaged or leak if adjusted beyond their intended limits.. Scope note: Oil leakage may also result from seal failure, impact damage, manufacturing defects, or wear, so over-adjustment is not the only possible cause. ↩
"Backcheck, latching speed and closing delay – what does it all ...", https://www.assaabloy.com/uk/en/knowledge-centre/door-controls/backcheck-latching-speed-closing-delay-what-does-it-all-mean. Door hardware standards and technical guidance describe hydraulic closers as devices that may regulate closing speed, latching speed, backcheck, and delayed action, supporting the article’s description of phased door control. Evidence role: definition; source type: institution. Supports: Hydraulic door closers may include separately adjustable closing, latching, backcheck, and delayed-action functions.. Scope note: Not every closer model includes all functions, and terminology may vary by standard or manufacturer. ↩