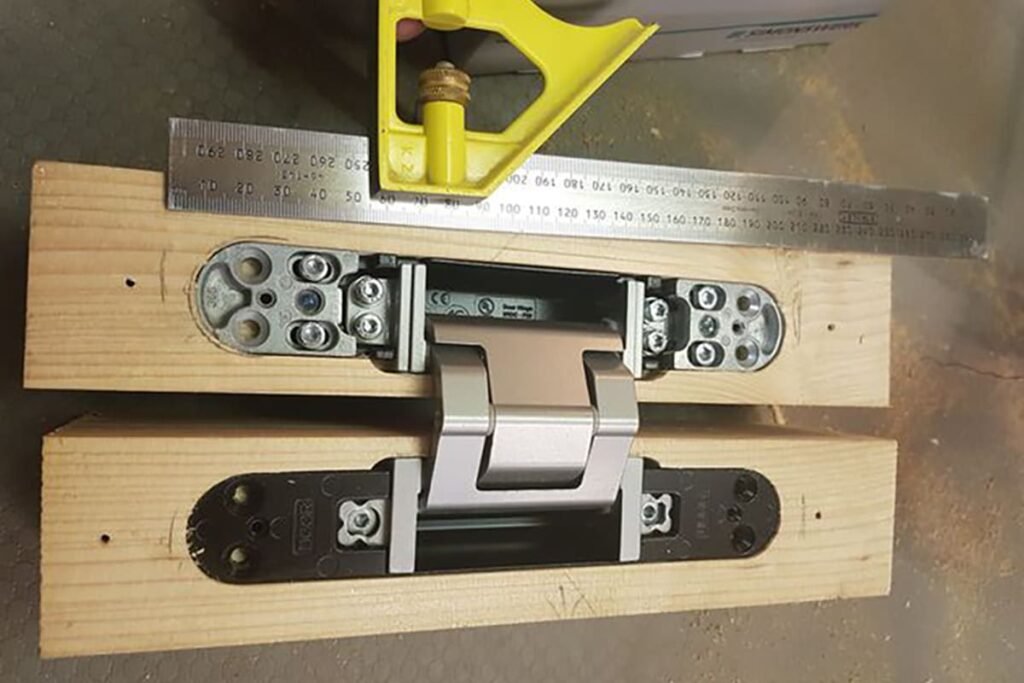
How to prepare door cutout for concealed hinge & mortise lock
A door cutout for concealed hinge and mortise lock can become a costly problem when the slot is copied from a catalog name instead of confirmed from the final hardware drawing. One wrong depth, screw hole, or lock position can scrap a door leaf.1 I treat cutout preparation as a controlled pre-machining process, not a quick drilling step.
To prepare a door cutout for concealed hinges and mortise locks, confirm the final supplier drawing or sample first, then check door thickness, hinge slot size, lock body position, faceplate matching, spindle and cylinder centers, screw holes, and processing method before cutting. Never rely on one universal cutout size.
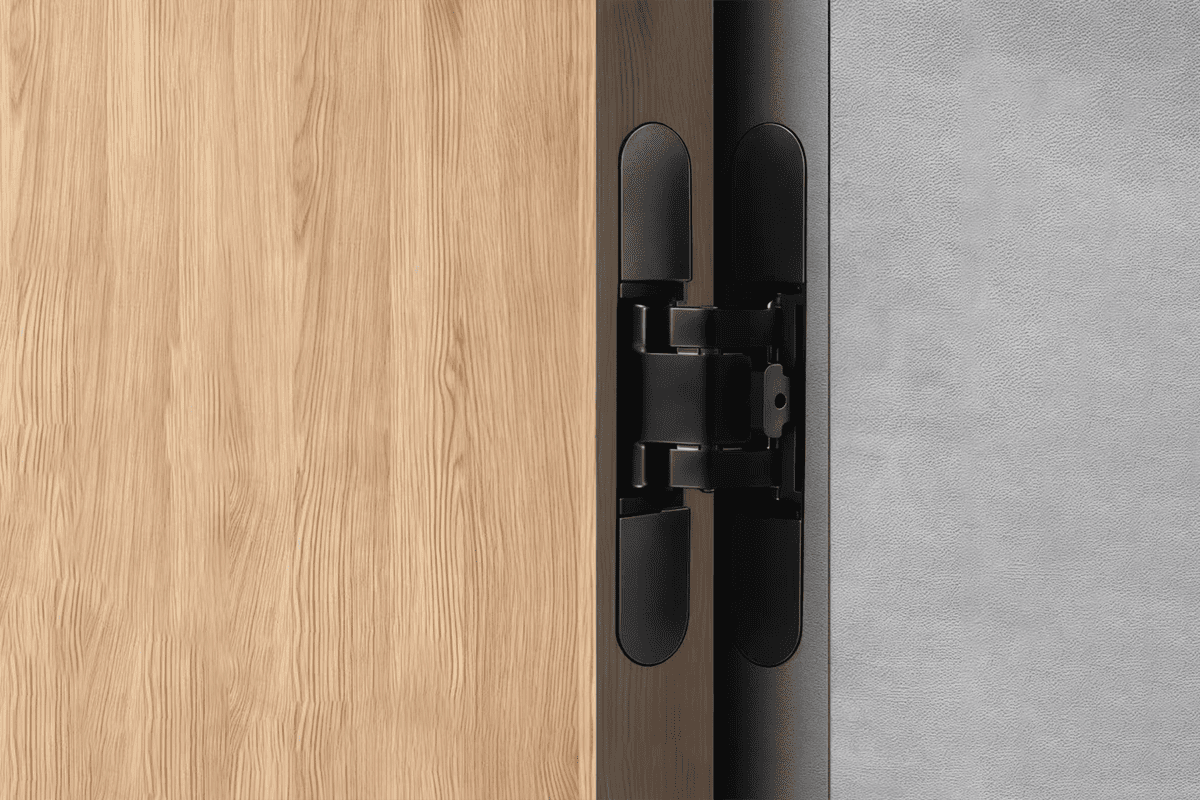
In my work with door factories and hardware buyers, most problems do not come from the hardware itself. They come from mismatched drawings, rushed pre-marking, or assuming that two similar-looking locks share the same embedded dimensions. The sections below explain what I usually ask customers to confirm before production starts.
Why does a door cutout for concealed hinge and mortise lock need supplier drawings?
A door cutout looks simple on paper, but the risk increases when the hinge plate, lock faceplate, and internal body must sit inside the door edge. If the drawing is outdated or generic, the factory may machine a clean slot that still does not fit the actual product.
The cutout should be based on the final supplier drawing or approved sample because concealed hinges and mortise locks vary by faceplate size, body depth, screw hole position, door thickness compatibility, and installation clearance.2 The product name alone cannot confirm the correct slot size or lock position.3
The drawing is the control document
When I help a door factory confirm hardware preparation, I always start with one question: which exact item will be installed on this order? A “concealed hinge” or “Euro mortise lock” is not enough. These terms describe product categories, not machining dimensions.
A proper supplier drawing should show:
- Overall product dimensions
- Recessed slot width, height, and depth
- Faceplate or hinge plate size
- Body depth inside the door
- Screw hole center distance
- Handle spindle center
- Cylinder center
- Backset and center distance
- Recommended door thickness range
- Opening direction or handing notes, if relevant
For mortise locks, I also check whether the drawing matches the actual faceplate style. A square faceplate, round-ended faceplate, narrow faceplate, or wider lock plate can change the edge preparation. If the lock body fits but the faceplate does not sit flush, the installation still fails from a buyer’s point of view.
Product names can hide important differences
Two locks may both be called “Euro mortise locks,” but they may not share the same:
| Item to compare | Why it matters for machining |
|---|---|
| Lock body depth | Affects pocket depth inside the door |
| Faceplate width | Affects visible edge recess width |
| Faceplate height | Affects vertical edge cutting |
| Backset | Affects handle and cylinder hole position |
| Center distance | Affects handle-to-cylinder alignment |
| Screw hole position | Affects fixing accuracy and assembly |
The same logic applies to concealed hinges. One hinge may have a deeper body. Another may need a longer recessed pocket. A third may have different screw hole spacing, even if the outside finish and opening angle look similar.
I prefer sample confirmation for new orders
For repeat orders, an approved drawing is usually enough if the specification has not changed. For a new product, a physical sample gives extra protection. I have seen cases where a buyer’s internal drawing was based on an earlier lock model, while the confirmed production item had a different faceplate.
That is why I recommend a simple control process:
- Confirm the final hardware code.
- Match the code with the supplier drawing.
- Check the door material and thickness.
- Approve the sample if the order is new or customized.
- Release the machining drawing only after hardware confirmation.
This process may feel slow at first. However, it is much faster than reworking hundreds of door leaves after cutting.
In factory supply, the safest door preparation is not the fastest cut. It is the cut that matches the final hardware.
How should I confirm concealed hinge door cutout dimensions?
A concealed hinge door cutout must match the hinge body and hinge plate, not just the hinge length shown in a catalog. The main risk is cutting a slot that is too shallow, too wide, misaligned, or unsuitable for the selected door thickness.
To confirm concealed hinge cutout dimensions, check the hinge plate width and height, embedded body depth, door and frame side positions, screw hole centers, door thickness range, and required clearance. The hinge must sit flush and align correctly before final fixing and adjustment.
Concealed hinges depend on recess accuracy
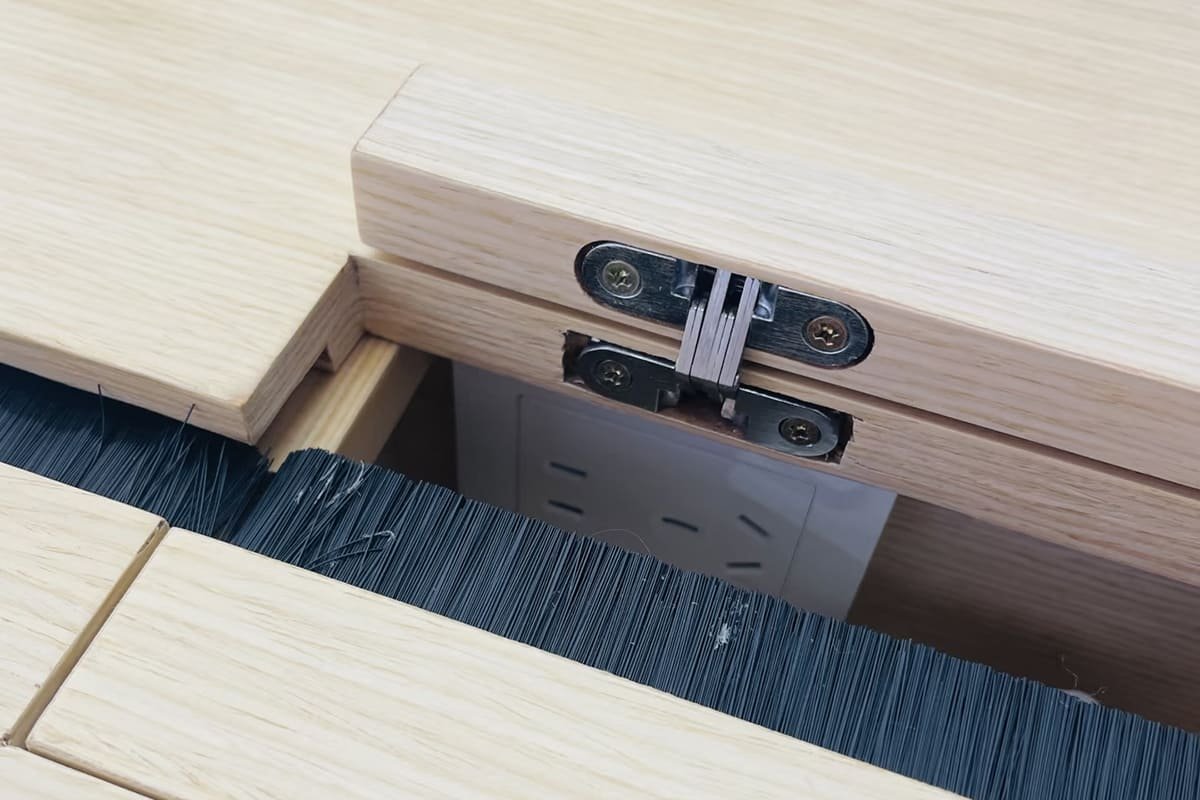
Concealed hinges are attractive because they are hidden when the door is closed.4 However, that clean appearance depends on accurate pre-machining. Unlike a surface-mounted hinge, a concealed hinge needs a pocket inside the door and often a matching pocket inside the frame.
The most important cutout dimensions usually include:
- Slot width
- Slot height
- Slot depth
- Hinge body clearance
- Plate thickness
- Screw hole center position
- Distance from door top or bottom
- Door edge offset
- Frame-side matching position
The hinge plate should sit flush with the door edge or frame surface according to the supplier’s design. If the pocket is too shallow, the plate may stand proud. If the pocket is too deep, the hinge may sit below the surface and create alignment problems. Both conditions can affect door closing performance.5
Door thickness must be checked early
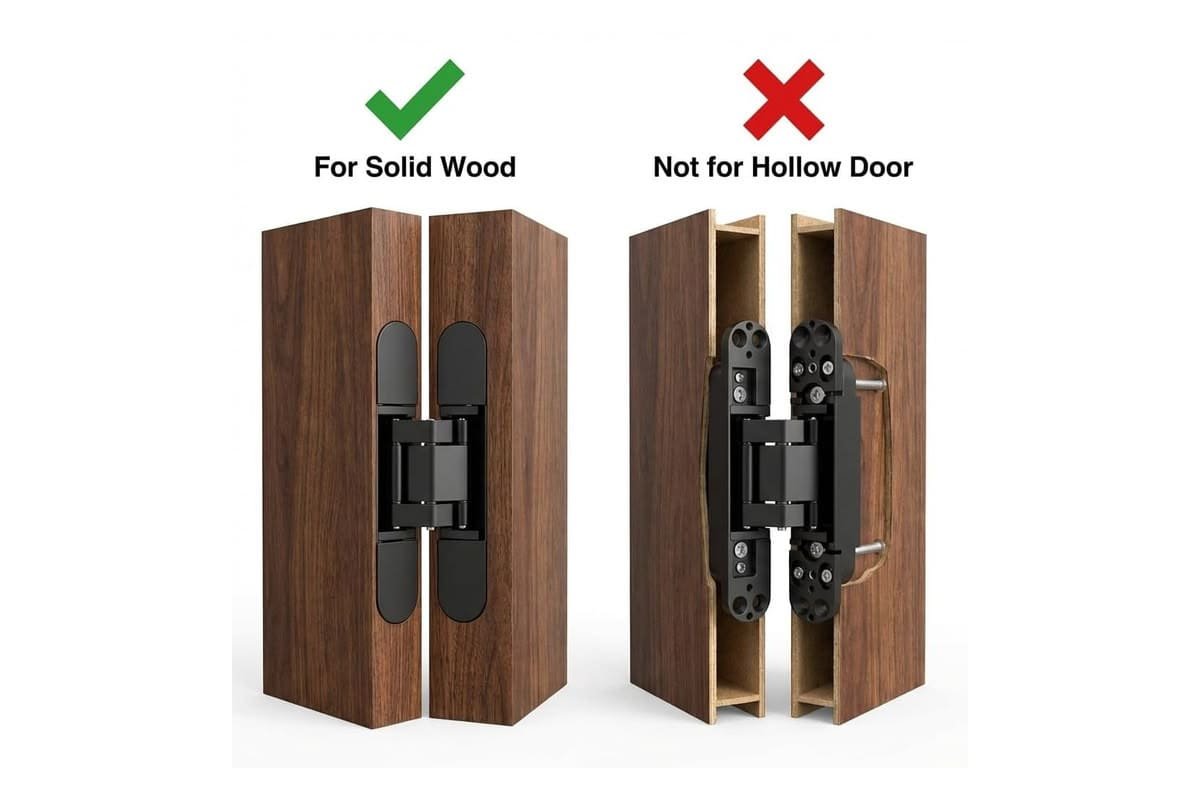
Door thickness is not a small detail. A concealed hinge has a body depth, and the door must have enough material to receive it.6 Wood doors, composite doors, and steel doors all behave differently during processing.
I usually ask factories to confirm:
| Check point | Why I check it |
|---|---|
| Door thickness | Confirms whether the hinge body can be embedded |
| Edge construction | Solid, hollow, reinforced, or composite edges affect holding strength |
| Frame material | Wood, steel, or aluminum frame preparation may differ |
| Hinge load rating | Helps match hinge quantity and door weight |
| Opening angle | May affect clearance around frame and door leaf |
The hardware supplier can provide product dimensions and performance documents. The door factory or project engineer should still evaluate whether the selected hinge is suitable for the door construction, expected door weight, and application environment.
Slot depth is often the hidden problem
Many workers notice width and height first because they are visible. Depth errors can be harder to catch until installation. A depth difference of even a small amount can change the way the hinge sits.
For example:
- A too-shallow pocket can cause the hinge to protrude.
- A too-deep pocket can reduce fixing pressure.
- A non-flat bottom surface can twist the hinge body.
- A rough pocket edge can prevent full seating.
- A misplaced screw hole can pull the hinge out of alignment.
With concealed hinges, the door cutout is not only about making space. It is also about supporting the hinge in the right position.
Wood door and frame matching should be checked together
For wood door factories using CNC machining, the process can be stable when the drawing is correct and the tooling is controlled. However, the door-side and frame-side pockets must still match each other. A perfect hinge pocket on the door does not help if the frame pocket is shifted.
Before mass production, I suggest checking:
- One complete door and frame set
- Hinge pocket seating
- Door closing gap
- Vertical alignment
- Screw fixing condition
- Adjustment range after installation
This is not meant to replace the door factory’s internal engineering process. It is a practical supplier-side check that reduces avoidable mistakes before the cutting program or template is repeated across many doors.
How should I prepare a mortise lock door cutout as a complete hardware set?
A mortise lock door cutout can fail even when the lock pocket itself is correct. The handle hole, cylinder hole, spindle center, screw holes, faceplate recess, and lock body position must work together as one complete hardware system.
To prepare a mortise lock cutout, confirm the lock body size, faceplate dimensions, backset, center distance, spindle hole, cylinder hole, fixing screw holes, and strike plate relationship. The door preparation should follow the approved lock drawing and the final handle and cylinder configuration.
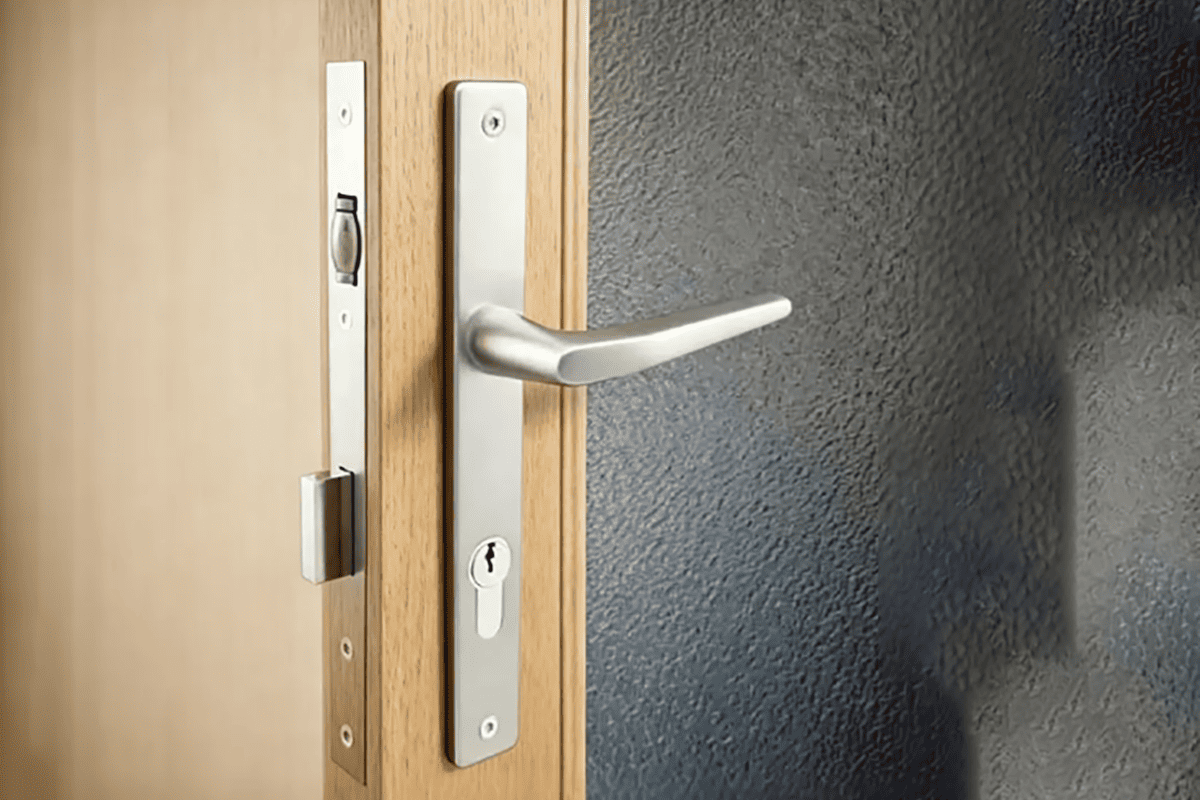
A mortise lock is not only a rectangular pocket7
A common mistake is to treat mortise lock preparation as one deep rectangular slot in the door edge. That pocket matters, but it is only one part of the preparation. A Euro-style mortise lock also interacts with the lever handle, cylinder, spindle, screws, faceplate, and strike plate.
I normally review these items together:
- Lock body height
- Lock body depth
- Lock body thickness
- Faceplate height
- Faceplate width
- Faceplate thickness
- Backset
- Center distance
- Follower or spindle size
- Cylinder hole position
- Through-bolt or handle fixing holes
- Screw hole positions
- Latch and deadbolt projection
- Strike plate position
If one hole is shifted, the final installation can still fail. For example, the lever handle may not engage the follower smoothly. The cylinder may not pass through the lock case correctly. The faceplate may fit, but the screws may not align.
Faceplate matching is critical
The faceplate is the visible metal strip on the door edge. It must sit correctly in the recessed edge area. Buyers often focus on lock function, but the faceplate affects both appearance and assembly.
Important faceplate checks include:
| Faceplate item | Cutting impact |
|---|---|
| Width | Determines edge recess width |
| Height | Determines vertical recess size |
| Thickness | Determines recess depth for flush fitting |
| End shape | Square or round ends affect tooling method |
| Screw hole location | Determines fixing hole drilling |
| Finish surface | Affects visible quality after installation |
A lock body may enter the door pocket, but the faceplate may still not sit flush if the recess is wrong. This problem becomes obvious after finishing, when rework is more expensive.
Backset and center distance control handle alignment
For Euro mortise locks, two common measurements require close attention:
- Backset: the distance from the door edge to the handle spindle or key/cylinder center line, depending on the drawing reference.
- Center distance: the vertical distance between the handle spindle center and the cylinder center.
These measurements affect how the handle set and cylinder line up with the lock body. When customers order locks, handles, cylinders, and accessories from different sources, I recommend checking all drawings together before cutting.
A simple review list helps:
- Does the handle spindle match the lock follower?
- Does the cylinder type match the lock case?
- Does the cylinder length match the door thickness and trim?
- Do handle fixing screws avoid conflict with the lock body?
- Does the rose or backplate cover the drilled holes properly?
- Does the strike plate match latch and deadbolt positions?
Strike plate relationship should not be forgotten
The lock side of the door leaf is only half of the system. The frame preparation for the strike plate must match the latch and deadbolt.8 If the strike is too high, too low, too shallow, or too deep, the door may not close smoothly.
For project doors, especially hotel, apartment, office, and fire-rated door sets, I suggest confirming the lock and strike relationship during sample assembly. Certification documents, fire-rated documents, and CE documents should be verified by the buyer according to project requirements. Hardware suppliers can provide documentation, but the project team should confirm suitability for the actual door assembly.
What changes when the door cutout is for steel doors?
A steel door door cutout leaves less room for correction than many wood door preparations. Once the sheet metal or reinforced area is punched, laser cut, or drilled, lock position and screw hole errors are much harder to hide or repair.
For steel doors, the lock body position, screw hole alignment, faceplate recess, reinforcement structure, and handle and cylinder holes require extra confirmation before processing. Steel door cutouts should be checked against the final lock drawing because post-cut adjustment is limited.
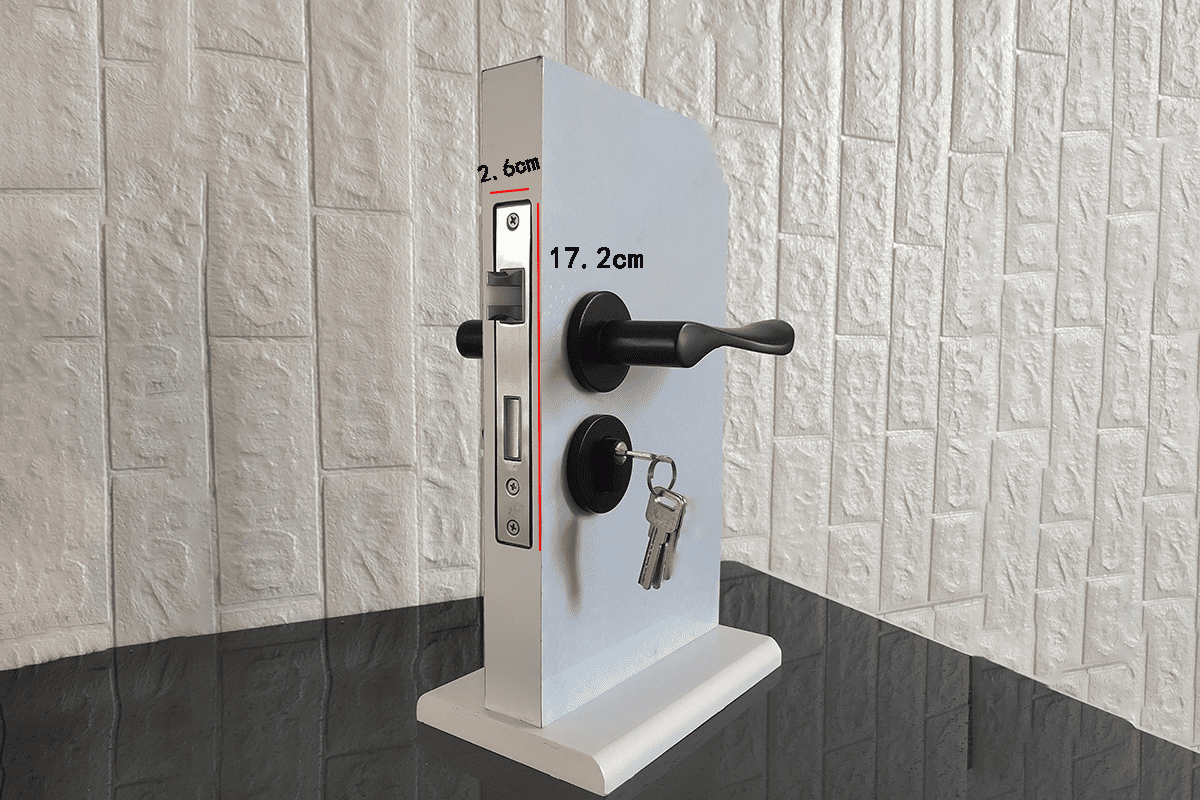
Steel doors reduce tolerance for mistakes
Wood can sometimes be adjusted, filled, or slightly reworked. Steel is less forgiving.9 A wrong hole position may require welding, grinding, repainting, or scrapping the panel. For this reason, I pay special attention to steel door drawings when customers confirm mortise locks and concealed hinges.
The most sensitive areas usually include:
- Lock body pocket
- Faceplate opening
- Handle spindle hole
- Cylinder hole
- Fixing screw holes
- Reinforcement plate position
- Concealed hinge pocket
- Frame-side hinge pocket
- Strike plate opening
A small position error can create a large assembly problem. For example, if the lock body is slightly shifted, the spindle may not rotate smoothly. If screw holes are off-center, the installer may force the screws and deform the hardware or panel.
Reinforcement and internal structure matter
Steel doors often include internal reinforcement plates or edge structures. The cutout must consider not only the outside skin but also the internal support. If the lock is installed in a weak or unsupported area, fixing strength may be affected.
I suggest confirming:
| Steel door item | Reason for confirmation |
|---|---|
| Edge reinforcement | Supports lock and hinge fixing |
| Sheet thickness | Affects screw holding and forming |
| Internal cavity | Affects lock body clearance |
| Welding position | May conflict with hardware pocket |
| Powder coating stage | Determines whether rework damages finish |
| Fire-rated core | May restrict cutting or modification |
If the door is fire-rated, the project team should verify the approved door assembly, lock type, hinge type, and relevant certification documents.10 I avoid treating certification as a general promise. Buyers should check the exact documentation for the final hardware and door set.
Screw hole accuracy is especially important
On steel doors, screw holes are not just small details. They control whether the hardware can be fixed without stress. A misplaced screw hole may pull the faceplate out of position or prevent the lock case from sitting correctly.
For mortise locks, screw hole accuracy affects:
- Faceplate fixing
- Lock case stability
- Handle backplate or rose fixing
- Cylinder escutcheon alignment
- Strike plate installation
For concealed hinges, screw hole accuracy affects:
- Hinge seating
- Adjustment range
- Door sag resistance
- Door-to-frame alignment
- Long-term opening and closing performance
Pre-production samples are worth the time
For steel doors, I strongly prefer a sample confirmation before mass processing. One complete sample door can reveal conflicts that drawings may not make obvious. This is especially true when a customer combines a lock, cylinder, handle, concealed hinge, door closer, and accessories from different sources.
A sample review should include:
- Hardware seating
- Flushness of faceplates and hinge plates
- Screw alignment
- Latch and deadbolt operation
- Cylinder insertion and rotation
- Handle operation
- Frame strike matching
- Door closing gap
This check does not replace the steel door factory’s engineering responsibility. It simply reduces the chance that a drawing mismatch becomes a large production loss.
Which processing method is safer for door cutout accuracy?
A door cutout can be made by CNC machining, punching, routing, drilling, or manual hole-cutter processing, but each method carries different risks. The safest method depends on door material, production volume, tolerance requirement, and the factory’s ability to inspect before cutting.
CNC machining is usually more stable for repeated wood door cutouts when the program and drawing are correct. Manual or hole-saw processing can work for smaller batches, but it requires stricter marking, checking, templates, and trial fitting before production continues.

CNC is stable only when the input is correct
Large wood door factories often use CNC machining because it supports repeatable slot dimensions and efficient production. For concealed hinges and mortise locks, CNC can control width, height, depth, and position more consistently than manual cutting.
However, CNC does not solve a wrong drawing. If the program is based on the wrong lock model, the machine will repeat the wrong cut very accurately. That is why I always separate two questions:
- Is the processing method accurate?
- Is the confirmed cutout data correct?
Both must be true.
Manual processing needs stricter checking
Smaller workshops may use hole saws, manual routers, jigs, or hand-marking methods. These methods can be suitable for small orders or flexible production, but they increase the need for inspection.
Manual preparation should pay extra attention to:
- Clear center line marking
- Stable templates or jigs
- Drill perpendicularity
- Slot depth control
- Edge tear-out control on wood doors
- Test fitting before repeating
- Separate checks for each hardware model
I do not recommend assuming that manual cutting can match CNC tolerance stability without careful process control. The worker’s skill matters, but the checking system matters more.
Processing method comparison
| Processing method | Common use | Strength | Main risk |
|---|---|---|---|
| CNC routing | Wood doors, large batches | Repeatable and efficient | Repeats wrong data if drawing is wrong |
| Punching or laser cutting | Steel doors | Accurate in sheet processing | Hard to correct after cutting |
| Manual router | Small wood batches | Flexible | Operator variation |
| Hole saw and drilling | Handle, cylinder, smaller holes | Simple and accessible | Center position errors |
| Template-based cutting | Small to medium batches | More consistent than freehand | Template must match hardware |
I recommend a first-piece inspection
Before full production, a first-piece inspection can prevent batch errors. This step is simple, but it is often skipped when production is urgent.
A practical first-piece checklist includes:
- Compare cutout with supplier drawing.
- Insert the actual hinge or lock body.
- Check faceplate flushness.
- Check screw hole alignment.
- Install handle and cylinder if applicable.
- Check latch, deadbolt, and spindle operation.
- Confirm frame or strike matching.
- Record any adjustment before mass cutting.
At SDH Hardware, our team often helps customers confirm drawings, slot dimensions, panel matching, lock body position, and installation notes before order production. This support is most useful when buyers share door material, thickness, intended processing method, and complete hardware combination early.
Frequently Asked Questions
Can I use one universal door cutout size for concealed hinges?
No. Concealed hinges vary by hinge body depth, plate size, screw hole spacing, and door thickness range. You should confirm the final supplier drawing or physical sample before machining. A universal size may look convenient, but it can cause poor seating, alignment failure, or rework.
What should I check before cutting a mortise lock pocket?
You should check the lock body size, faceplate width and height, backset, center distance, spindle hole, cylinder hole, screw holes, handle compatibility, and strike plate position. The mortise lock preparation should be treated as a full hardware set, not only as one edge pocket.
Are steel door cutouts more difficult than wood door cutouts?
Steel door cutouts usually require stricter confirmation because adjustment space is limited after cutting. Lock body position, screw holes, reinforcement, handle holes, and cylinder holes must be accurate. Mistakes may require welding, repainting, or panel replacement, especially after surface finishing.
Is CNC machining always the best way to prepare door cutouts?
CNC machining is often more stable for repeated wood door production, but it is only accurate when the drawing and program are correct. Manual methods can work for smaller batches, but they need careful marking, templates, first-piece inspection, and trial fitting.
Should I confirm the hardware sample before mass production?
Yes, especially for new products, customized hardware, steel doors, or mixed hardware sets from different suppliers. A sample helps confirm slot fit, faceplate flushness, screw alignment, handle operation, cylinder position, and frame matching before the factory repeats the cutout across many doors.
Conclusion
A door cutout for concealed hinge and mortise lock should always start with confirmed hardware data, not assumptions. The safest process is to check supplier drawings, door thickness, slot width, height, depth, faceplate matching, lock body position, screw holes, and processing method before cutting. At SDH Hardware, I help door factories and hardware buyers confirm these details for OEM, ODM, and bulk supply projects. If you are preparing a new door hardware order, contact us with your drawings and door specifications so we can support accurate product matching before production.
"Strategies to Reduce Nonconformance of Parts in Aerospace ...", https://scholarworks.waldenu.edu/cgi/viewcontent.cgi?article=14307&context=dissertations. Manufacturing quality-control literature treats dimensional nonconformance as a common cause of rework or scrap after processing, supporting the production-risk rationale here, although it does not quantify scrap rates for door leaves specifically. Evidence role: general_support; source type: research. Supports: A source should support that dimensional nonconformance in manufacturing commonly causes rework or scrap, especially when errors are discovered after machining.. Scope note: Contextual support; it supports the mechanism of scrap from dimensional nonconformance but not this exact door-hardware scenario. ↩
"DOOR HARDWARE (SCHEDULED BY DESCRIBING PRODUCTS)", https://fpm.usc.edu/wp-content/uploads/2021/11/087102-USC-HSC-door-hardware-Guide-Specification_1.pdf. Architectural hardware references specify mortise locks and concealed hinges by model-specific dimensions, including body depth, faceplate or plate size, screw locations, and compatible door thickness, supporting the need to verify these details before machining. Evidence role: general_support; source type: institution. Supports: A source should document that mortise locks and concealed hinges are specified by dimensions such as body size, faceplate or plate dimensions, screw positions, backset, and door-thickness range.. ↩
"SECTION 087111 - DOOR HARDWARE (SCHEDULED BY ...", https://fpm.usc.edu/wp-content/uploads/2021/11/087102-USC-HSC-door-hardware-Guide-Specification_1.pdf. Architectural hardware installation guidance commonly requires model-specific templates or manufacturer drawings for locating cutouts and fasteners, supporting the statement that a product category name alone is not sufficient, though it does not compare all possible catalog names. Evidence role: expert_consensus; source type: institution. Supports: A source should show that door hardware installation depends on model-specific templates or drawings with dimensions such as backset, faceplate, and screw locations.. Scope note: Contextual support; the source should establish the standard practice but may not explicitly phrase the issue as a product-name problem. ↩
"Concealed hinge jig", https://en.wikipedia.org/wiki/Concealed_hinge_jig. A concealed hinge is generally defined as a hinge designed to be hidden from view when the door or panel is closed, supporting the description of its visual purpose. Evidence role: definition; source type: encyclopedia. Supports: A source should define concealed hinges as hinges intended to be hidden or not visible when the door or panel is closed.. ↩
"087100 – DOOR HARDWARE - Facilities and Campus Services", https://fcs.cornell.edu/087100-door-hardware. Door-installation guidance links hinge recess depth and flush seating with proper alignment and closing action, supporting the mechanism described here, although the guidance may address conventional hinges rather than concealed hinges specifically. Evidence role: mechanism; source type: education. Supports: A source should explain that hinge placement, recess depth, or hinge flushness affects door alignment and closing operation.. Scope note: Contextual support; hinge-alignment mechanics are applicable, but the source may not focus only on concealed hinges. ↩
"087100 – DOOR HARDWARE - Facilities and Campus Services", https://fcs.cornell.edu/087100-door-hardware. Technical installation references for concealed hinges specify compatible door-thickness ranges and recessed body dimensions, supporting the need to ensure enough door material remains for the hinge pocket. Evidence role: mechanism; source type: institution. Supports: A source should support that concealed hinges have minimum door-thickness or material-depth requirements because part of the hinge body is recessed into the door or frame.. ↩
"Lockset", https://en.wikipedia.org/wiki/Lockset. Reference descriptions of mortise locks identify the lock case together with related components such as the faceplate, spindle or follower, cylinder, and strike, supporting the view that installation is more than cutting a single rectangular pocket. Evidence role: definition; source type: encyclopedia. Supports: A source should define a mortise lock and identify related components such as the lock case, faceplate, spindle or follower, cylinder, and strike.. ↩
"49 CFR 571.206 -- Standard No. 206; Door locks and ...", https://www.ecfr.gov/current/title-49/subtitle-B/chapter-V/part-571/subpart-B/section-571.206. Door inspection and installation guidance identifies proper latch-bolt and strike engagement as necessary for reliable closing and locking, supporting the requirement that frame preparation match the latch and deadbolt positions. Evidence role: mechanism; source type: institution. Supports: A source should support that the strike must be correctly positioned for latch and deadbolt engagement and reliable door closing or locking.. ↩
"(PDF) Aircraft Metal Structural Repair", https://www.academia.edu/35907614/Aircraft_Metal_Structural_Repair. Sheet-metal fabrication guidance shows that misplaced cutouts or holes generally cannot be shifted without secondary repair operations such as welding, grinding, refinishing, or replacing the part, supporting the statement that steel door preparation is less forgiving than adjustable wood work. Evidence role: mechanism; source type: education. Supports: A source should explain that errors in sheet-metal cutouts or holes generally require more involved repair processes, such as welding, grinding, refinishing, or replacement.. Scope note: Contextual support; the source may address sheet-metal parts broadly rather than finished steel doors specifically. ↩
"Fire Doors and NFPA 80 FAQs", https://www.nfpa.org/news-blogs-and-articles/blogs/2025/04/11/fire-doors-faqs. Fire-door standards require rated door assemblies and their hardware to conform to the applicable listing or approval, supporting the need to verify the final door assembly, lock, hinge, and certification documents before modification or installation. Evidence role: expert_consensus; source type: institution. Supports: A source should support that fire-rated door assemblies must use approved or listed components and that field modifications or hardware changes must comply with the listing or applicable fire-door standard.. ↩